Blazing Quillography

Hi friends, I would love to show you my new Quillography work .
This is my first DT post for CraftGully. Though I have been using CraftGully Quilling supplies for almost 4 years now. I haven't had the opportunity to tell how dependent I am for my Quilling supplies on CraftGully.
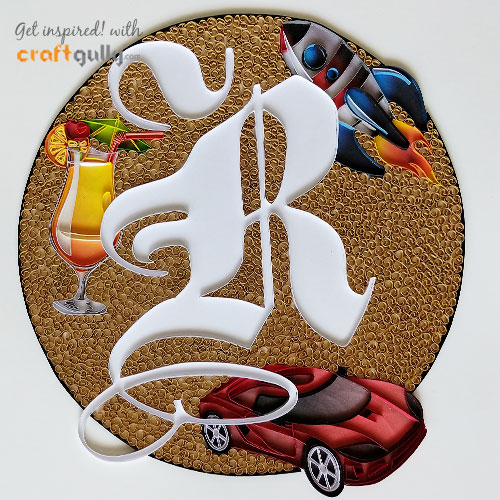
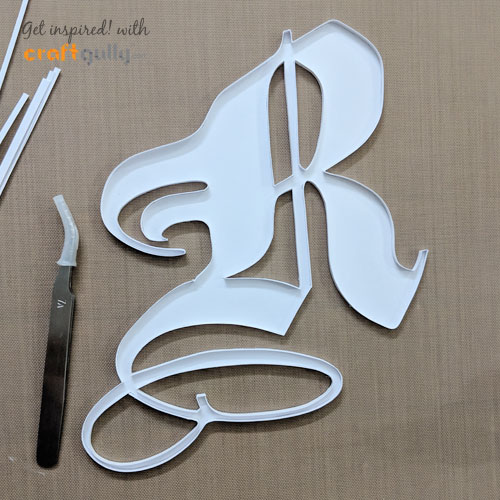
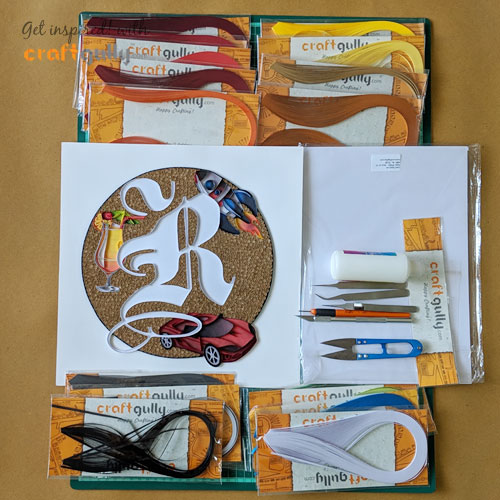
My quilled 'R' is a customised work which entails edge work with connected scrolls. The total size is 12 x 12 inches
Here is a basic step guide as to how I did this project.
I started with a White CraftGully card stock and cut out the image of the "R" that I wanted to quill.
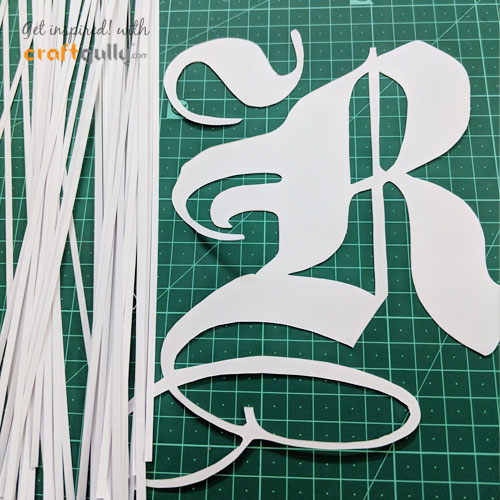
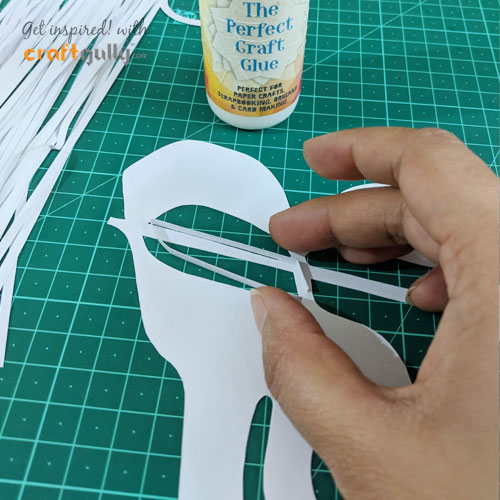
Then I made 3mm white Quilling strips from the same cardstock to complete the on edge R Quillography. You can also use white Quilling strips from the store which will save a lot of time. I made the Quilling strips as I wanted to match the colour of the cardstock to the strips.
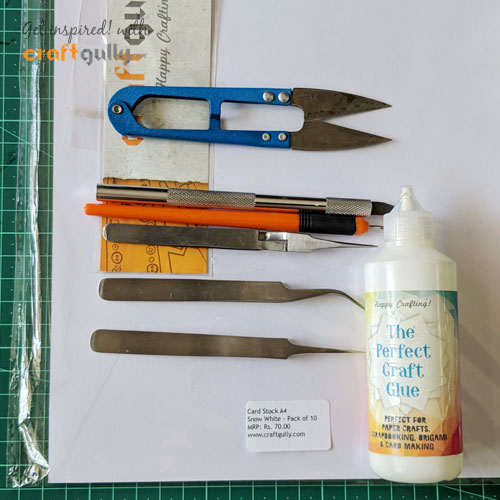
The Perfect Craft Glue from CraftGully is really apt as it is tacky and not very watery for quilling.
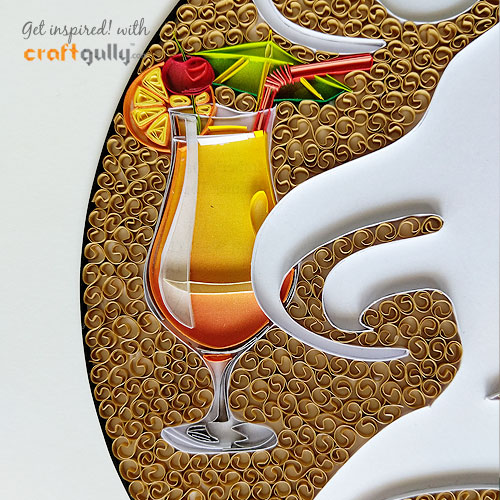
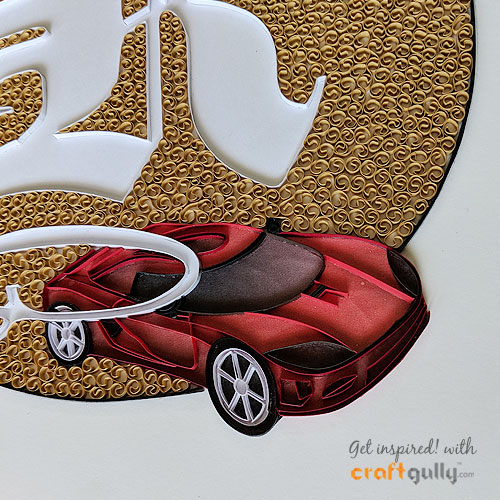
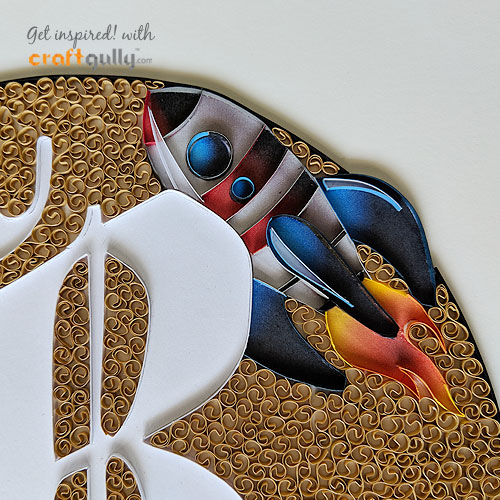
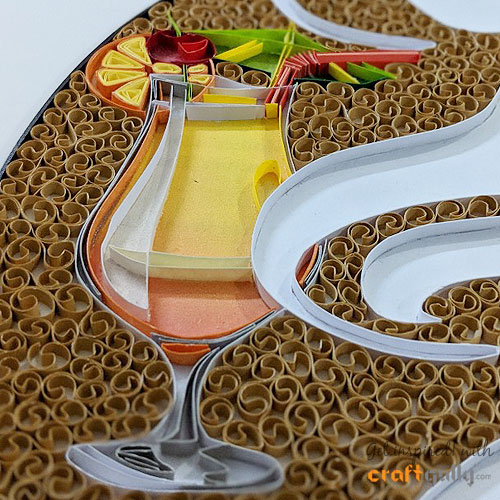
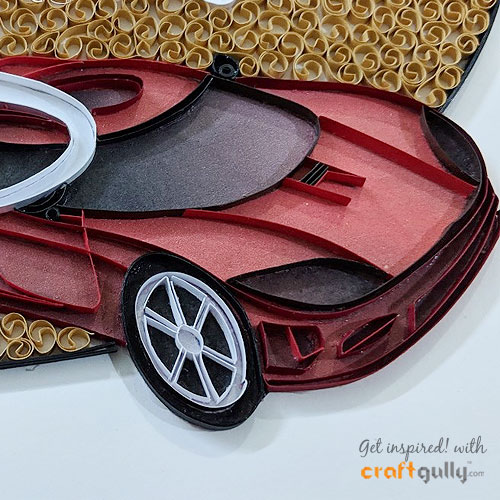
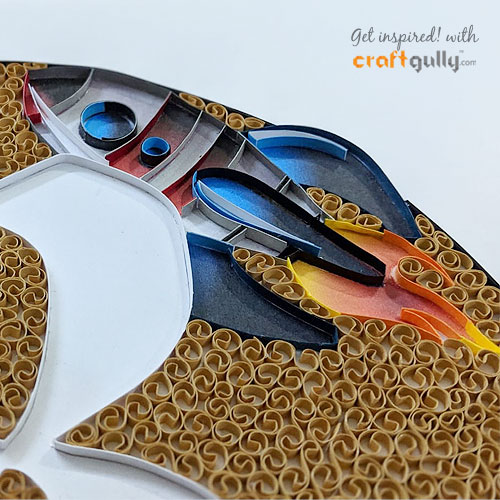
After completing the R, I wanted to customise the look according to the person it is for . So I chose the corresponding images to quill on.
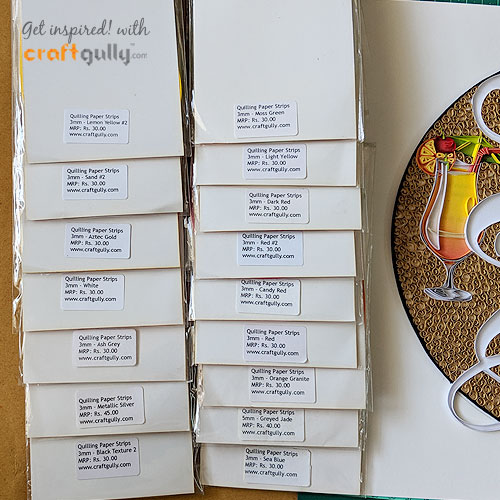
The shades in 3mm strips at CraftGully made it easy to choose the colours needed for the elements.
For the car, rocket and mocktail glass I marked the images where I wanted to paste them next to R , and I did not do the edge work quilling on that area. When all images were completed it was easy to stick them underneath the R.
I finally filled out the areas surrounding the R with connected scrolls.
Here are some of my quilling essentials from CraftGully that I have used in the project
Products Used in this project:
- 3mm Quilling Strips in various shades including Lemon Yellow #2, Moss Green, Sand #2, Light Yellow, Dark Red, Aztec Gold, Red #2, White, Candy Red, Ash Grey, Red, Orange Granite, Metallic Silver, Greyed Jade, Sea blue, Black Texture #2
- White Card Stock
- Craft Scissors
- Quilling Tool
- Precision Cutting Knife
- Tweezers
- The Perfect Craft Glue
I hope you like it as much as I enjoyed working on it.

Leave a Comment