
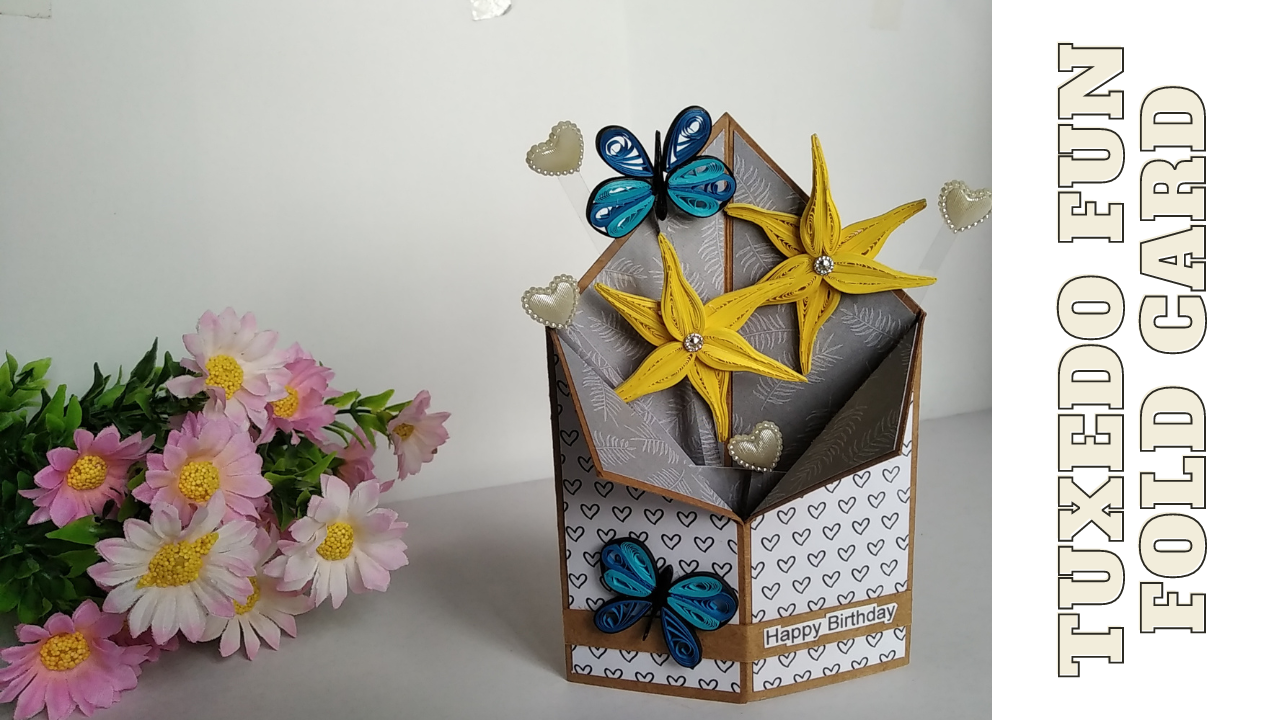
Tuxedo Fold Quilled Card
08 Apr

Hello Crafters! I am so glad to meet you all through CraftGully as a Design Team member. Today’s project is going to be a fun-fold card with paper quilling in it. Hope you will enjoy the process.
We have a video as well as a series of step-by-step photos for the tutorial.
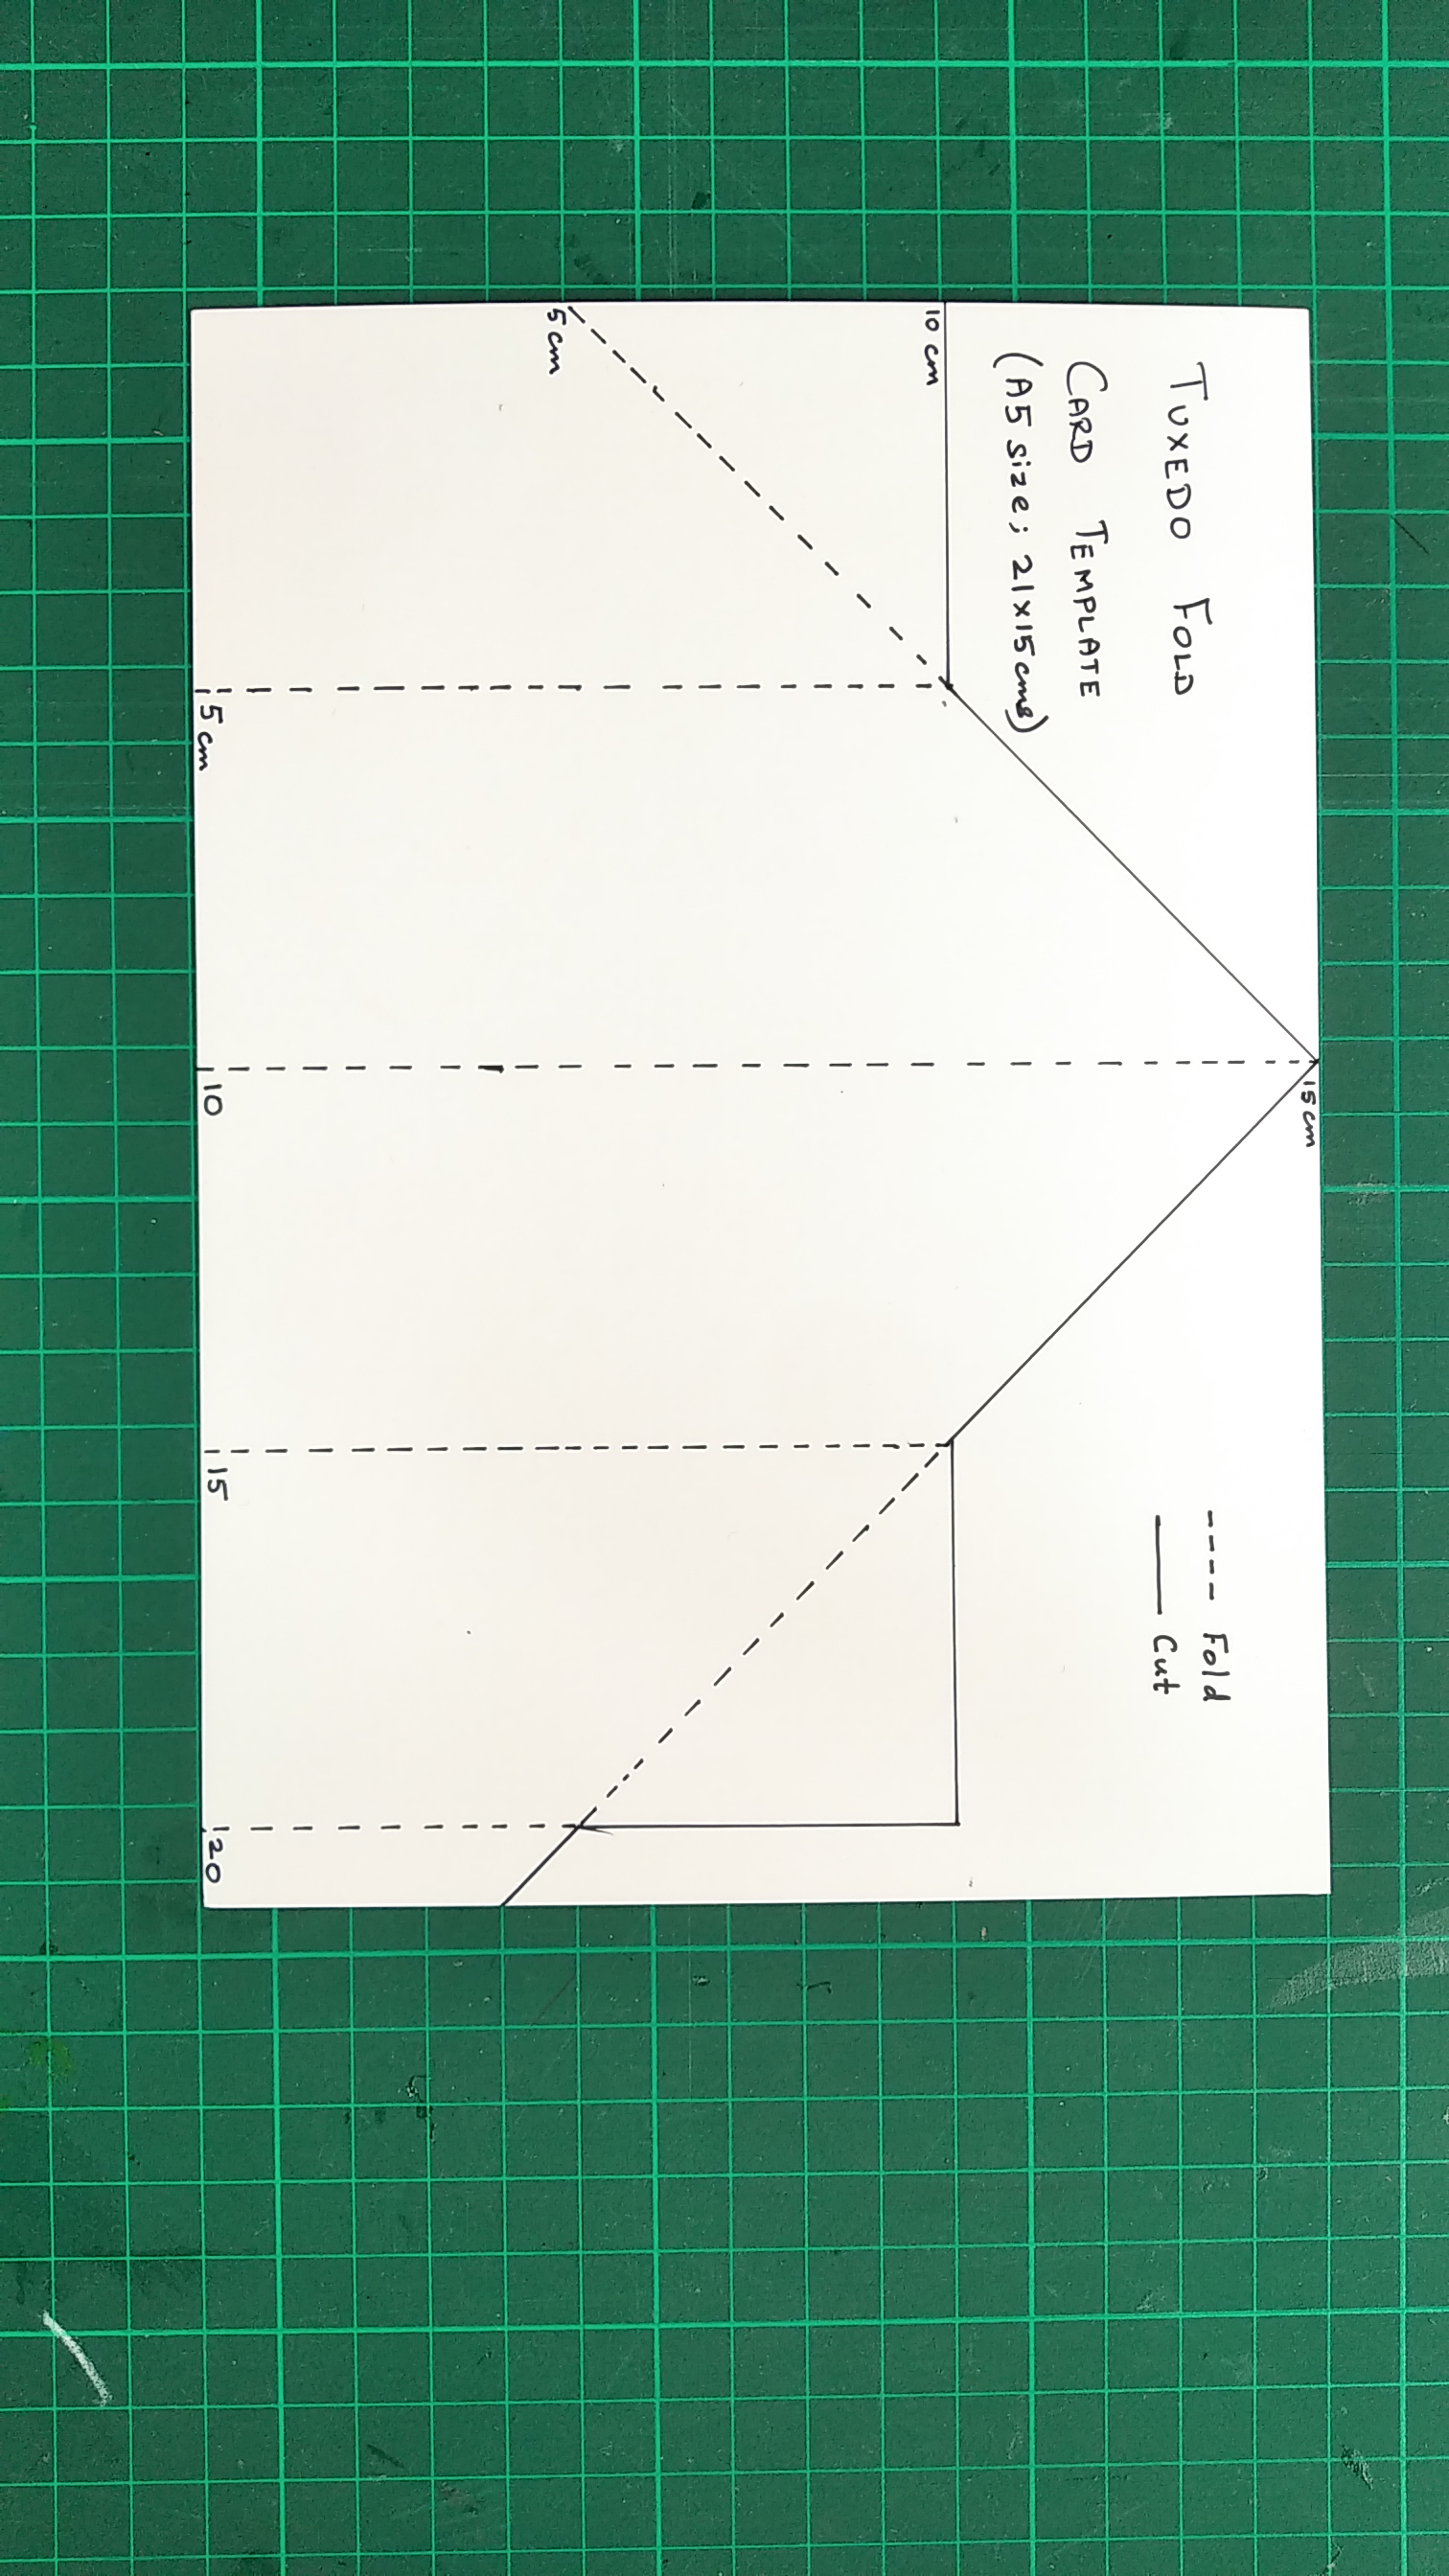
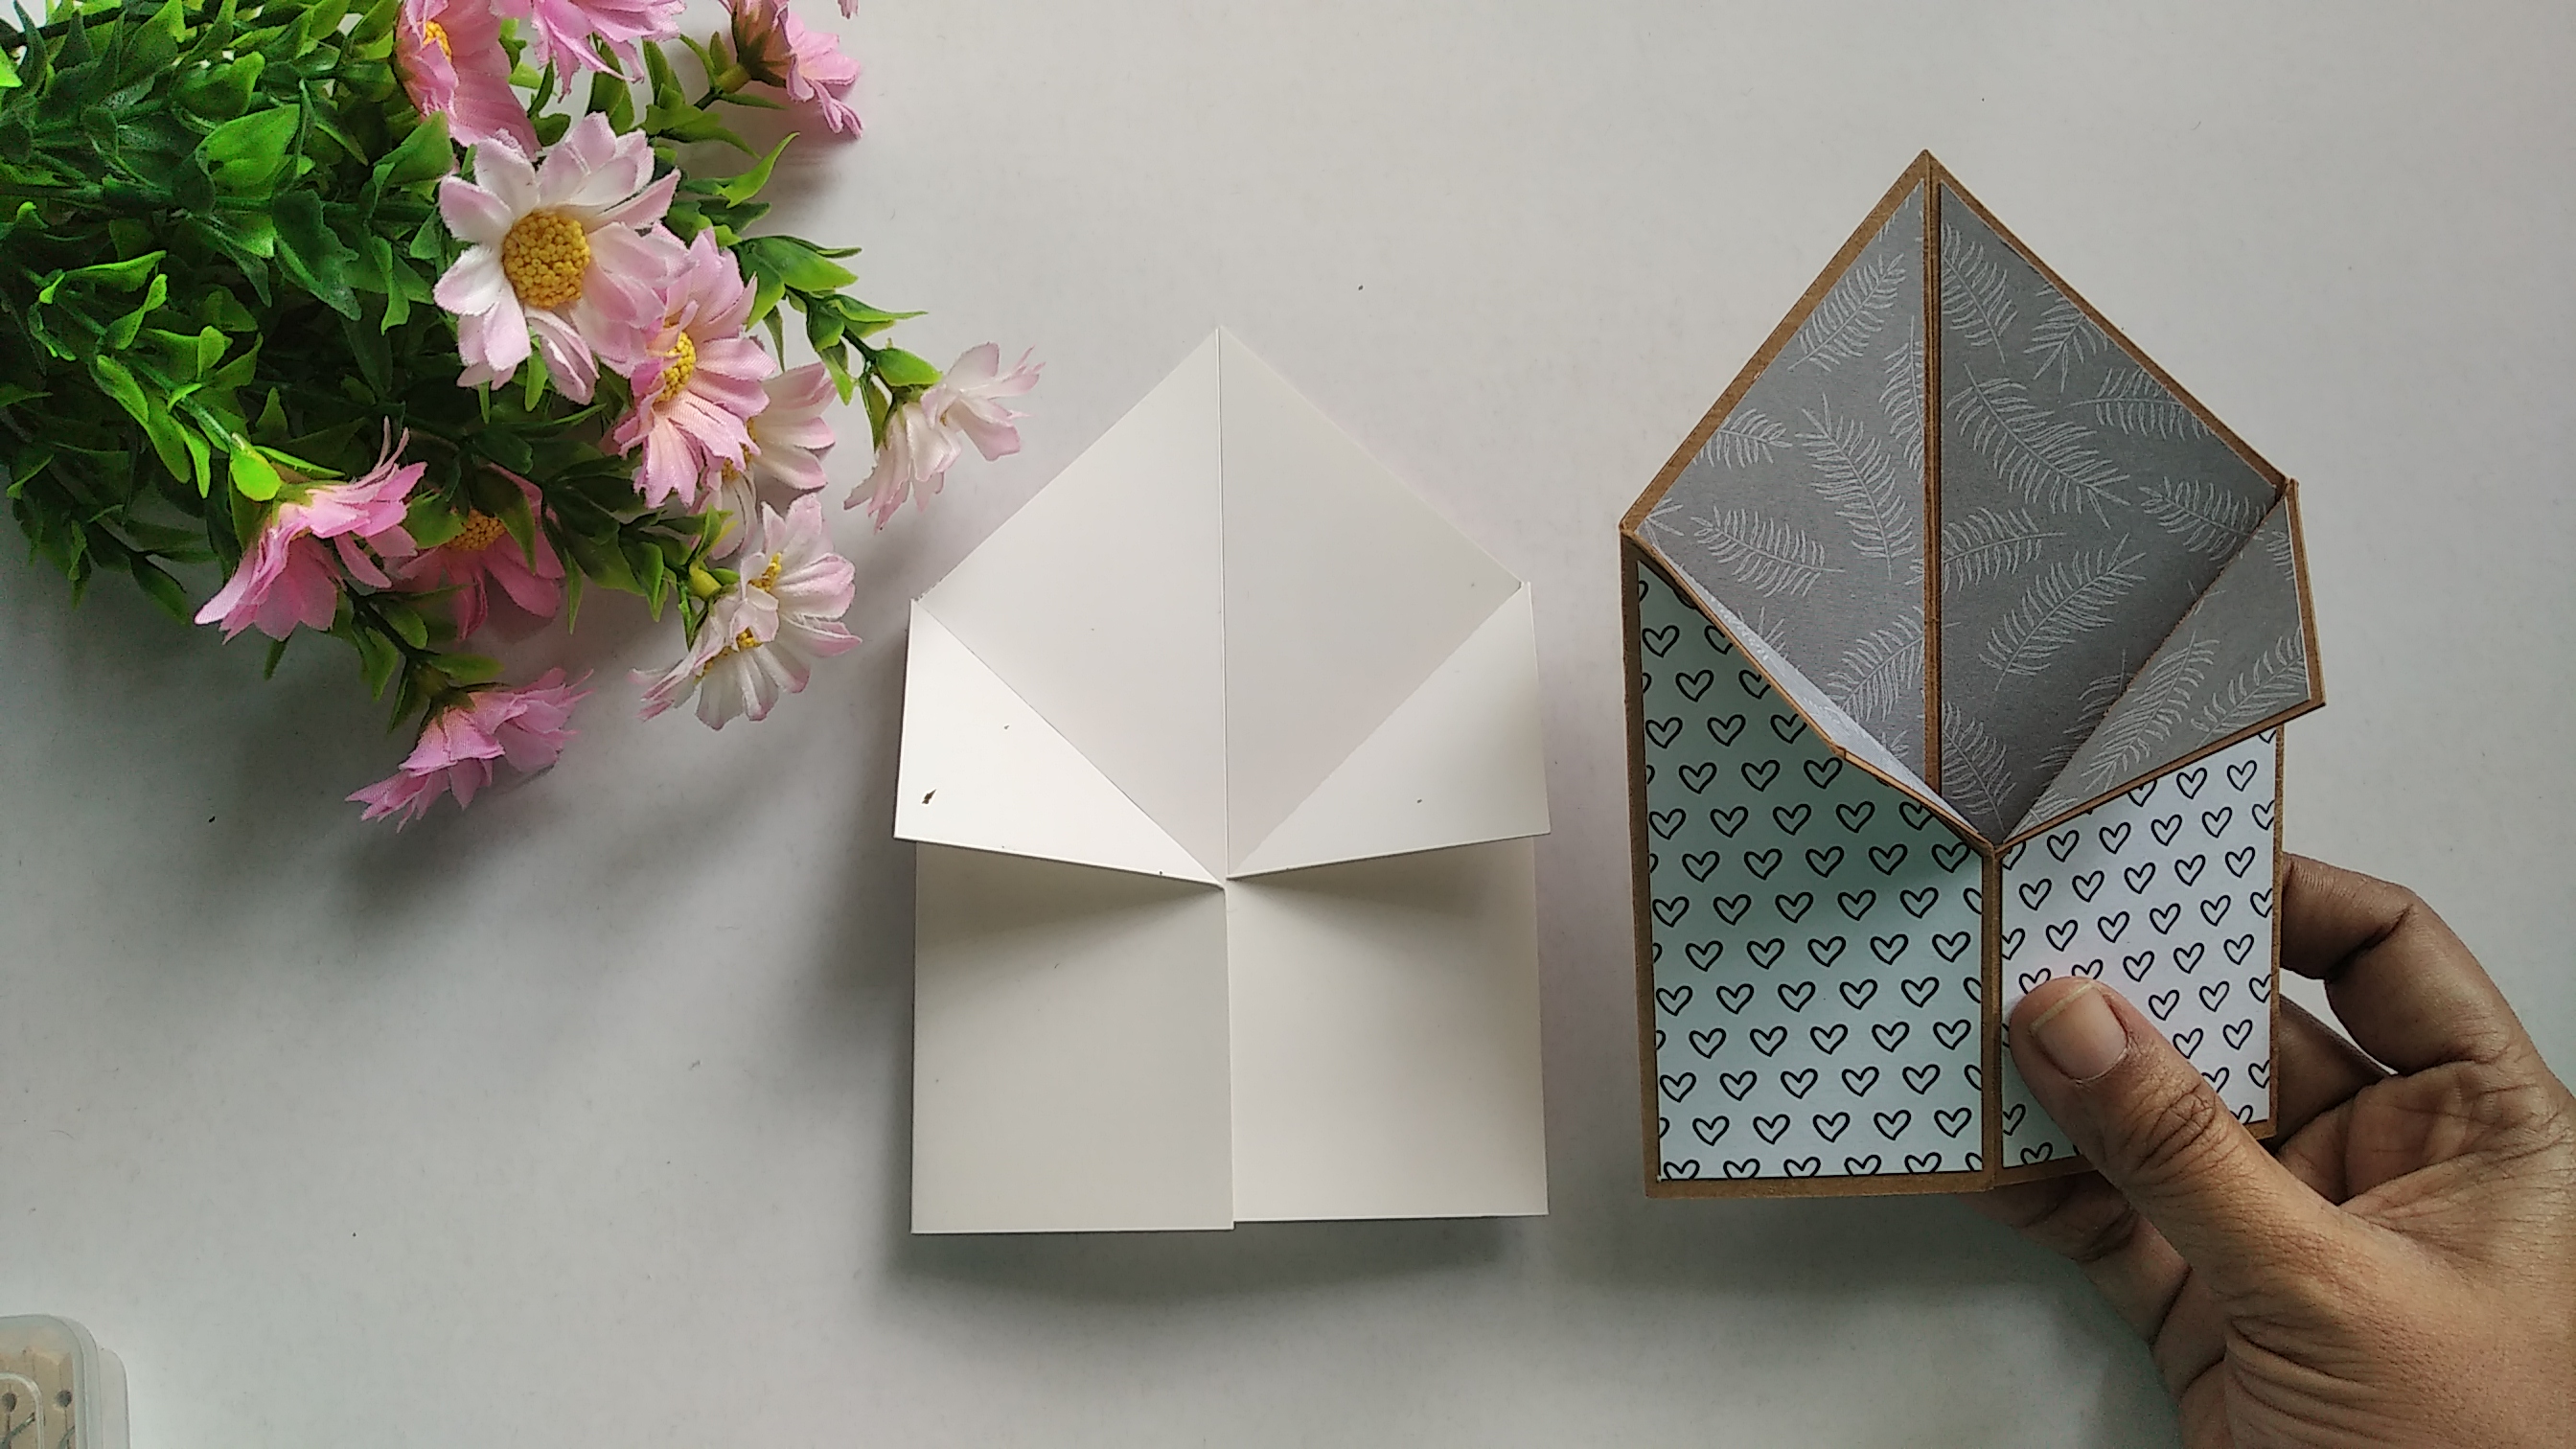
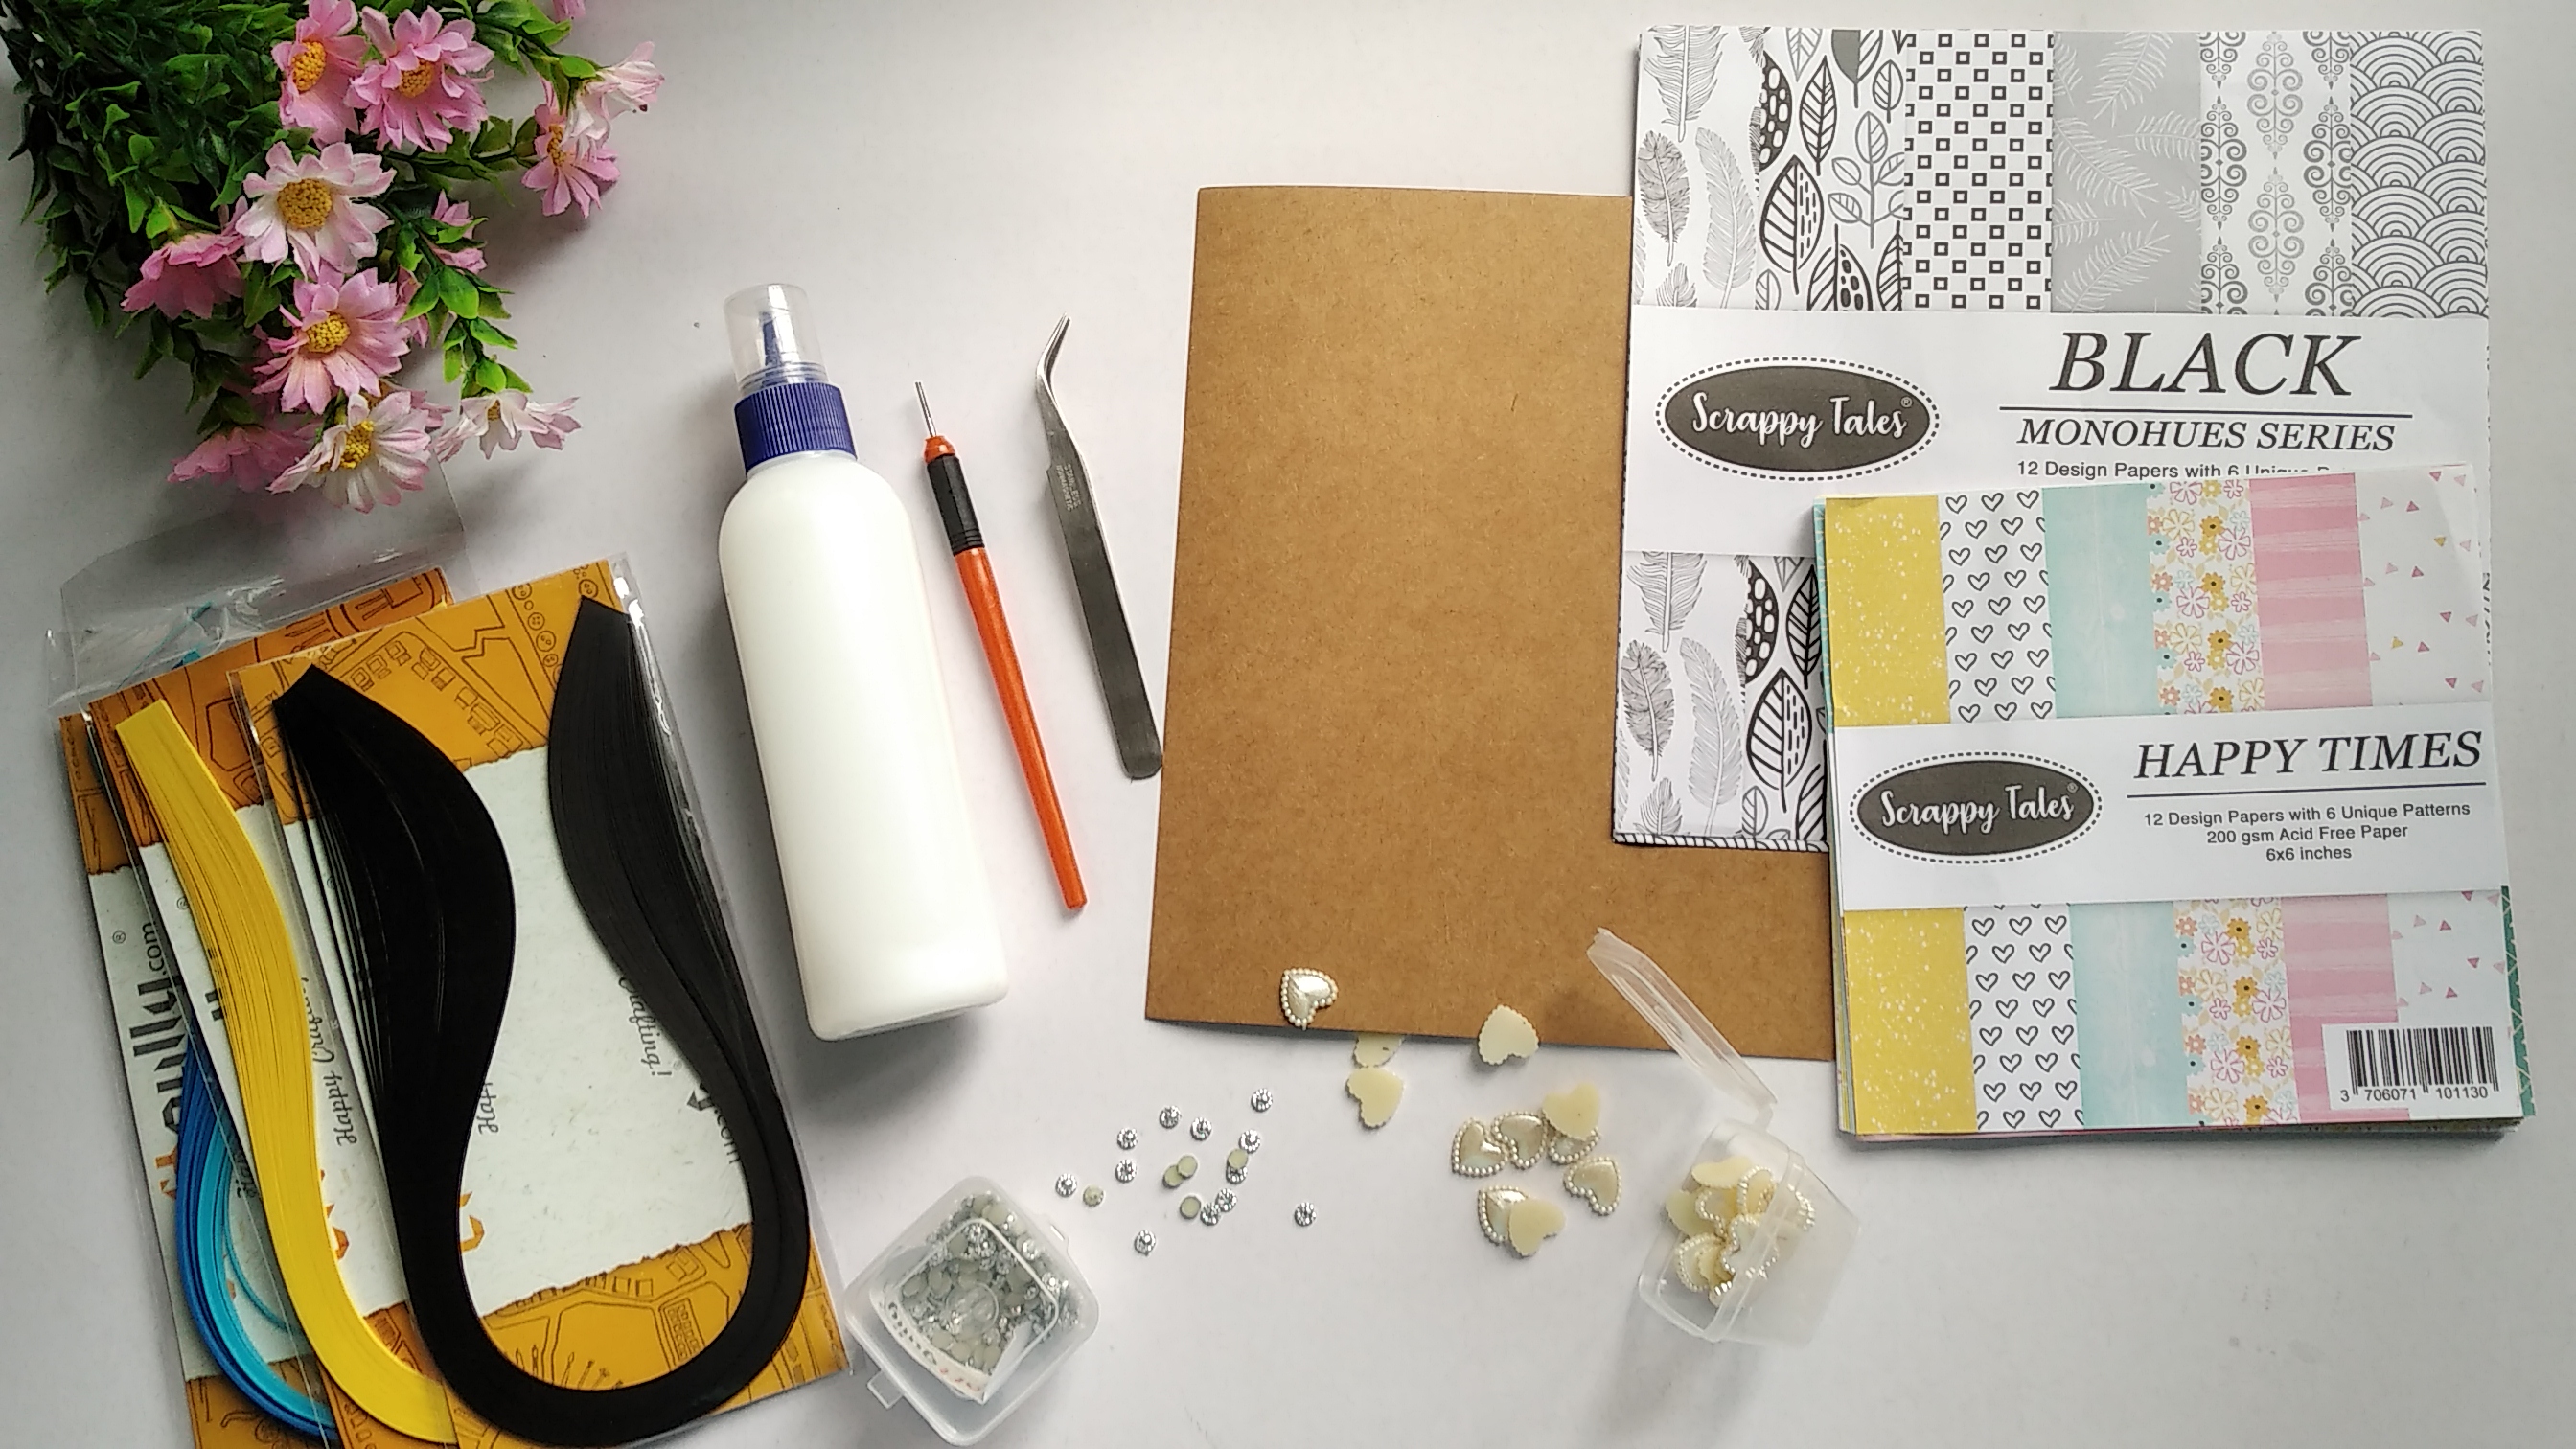
For the card, I am using Kraft cardstock. This cardstock is 400 gsm in thickness, you can very well use a cardstock that is 220 - 300 gsm in thickness. The card base is 21 x 15 cms in size (A5 size), and the measurements are in metrics. Do follow the below image for the card template or download the free printable template.
Using pattern papers, I also cut the layers to add on to the card. Make sure to cut these layers a bit smaller in size, so that they leave a beautiful outline on the kraft cardstock.
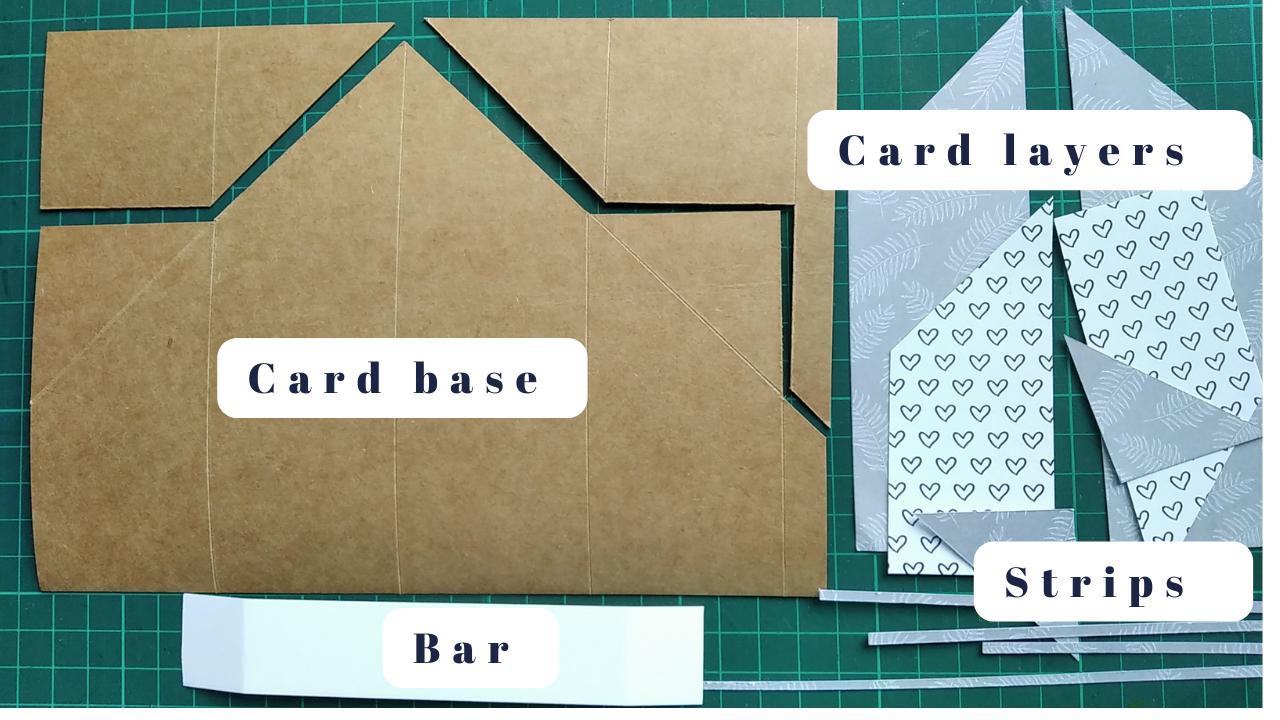
Next, I attached the pattern papers using glue on the right places.
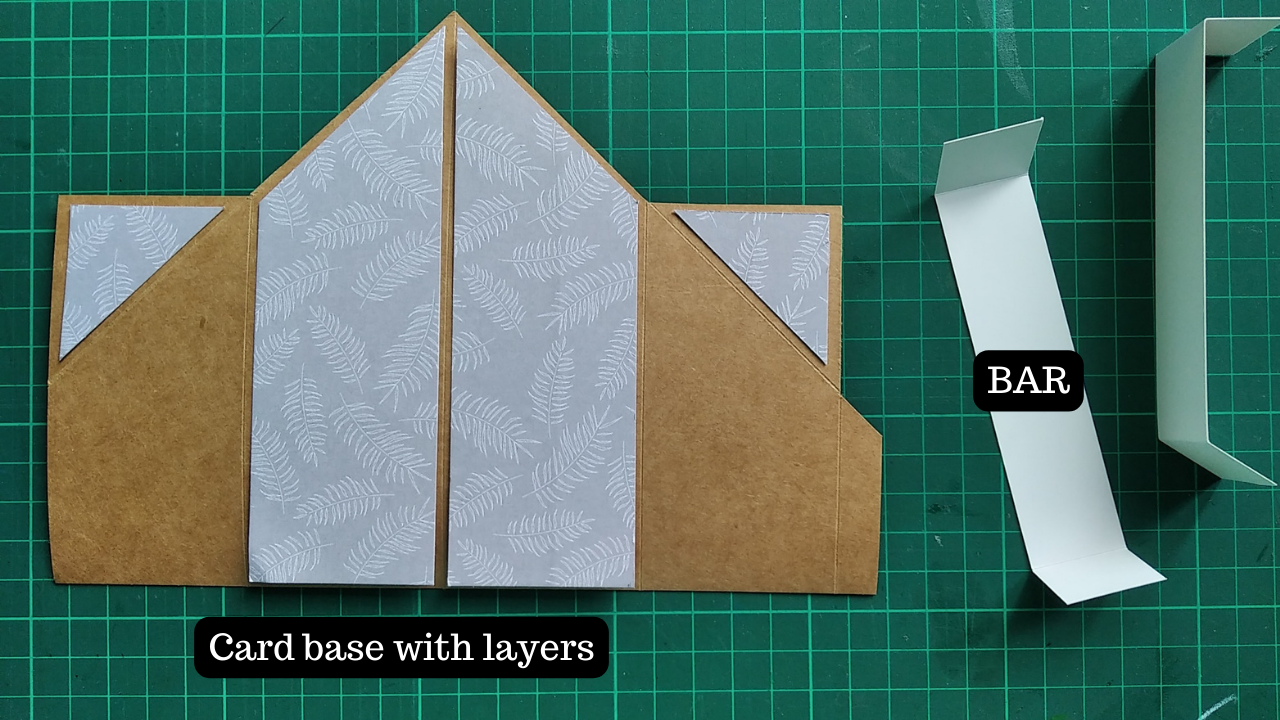
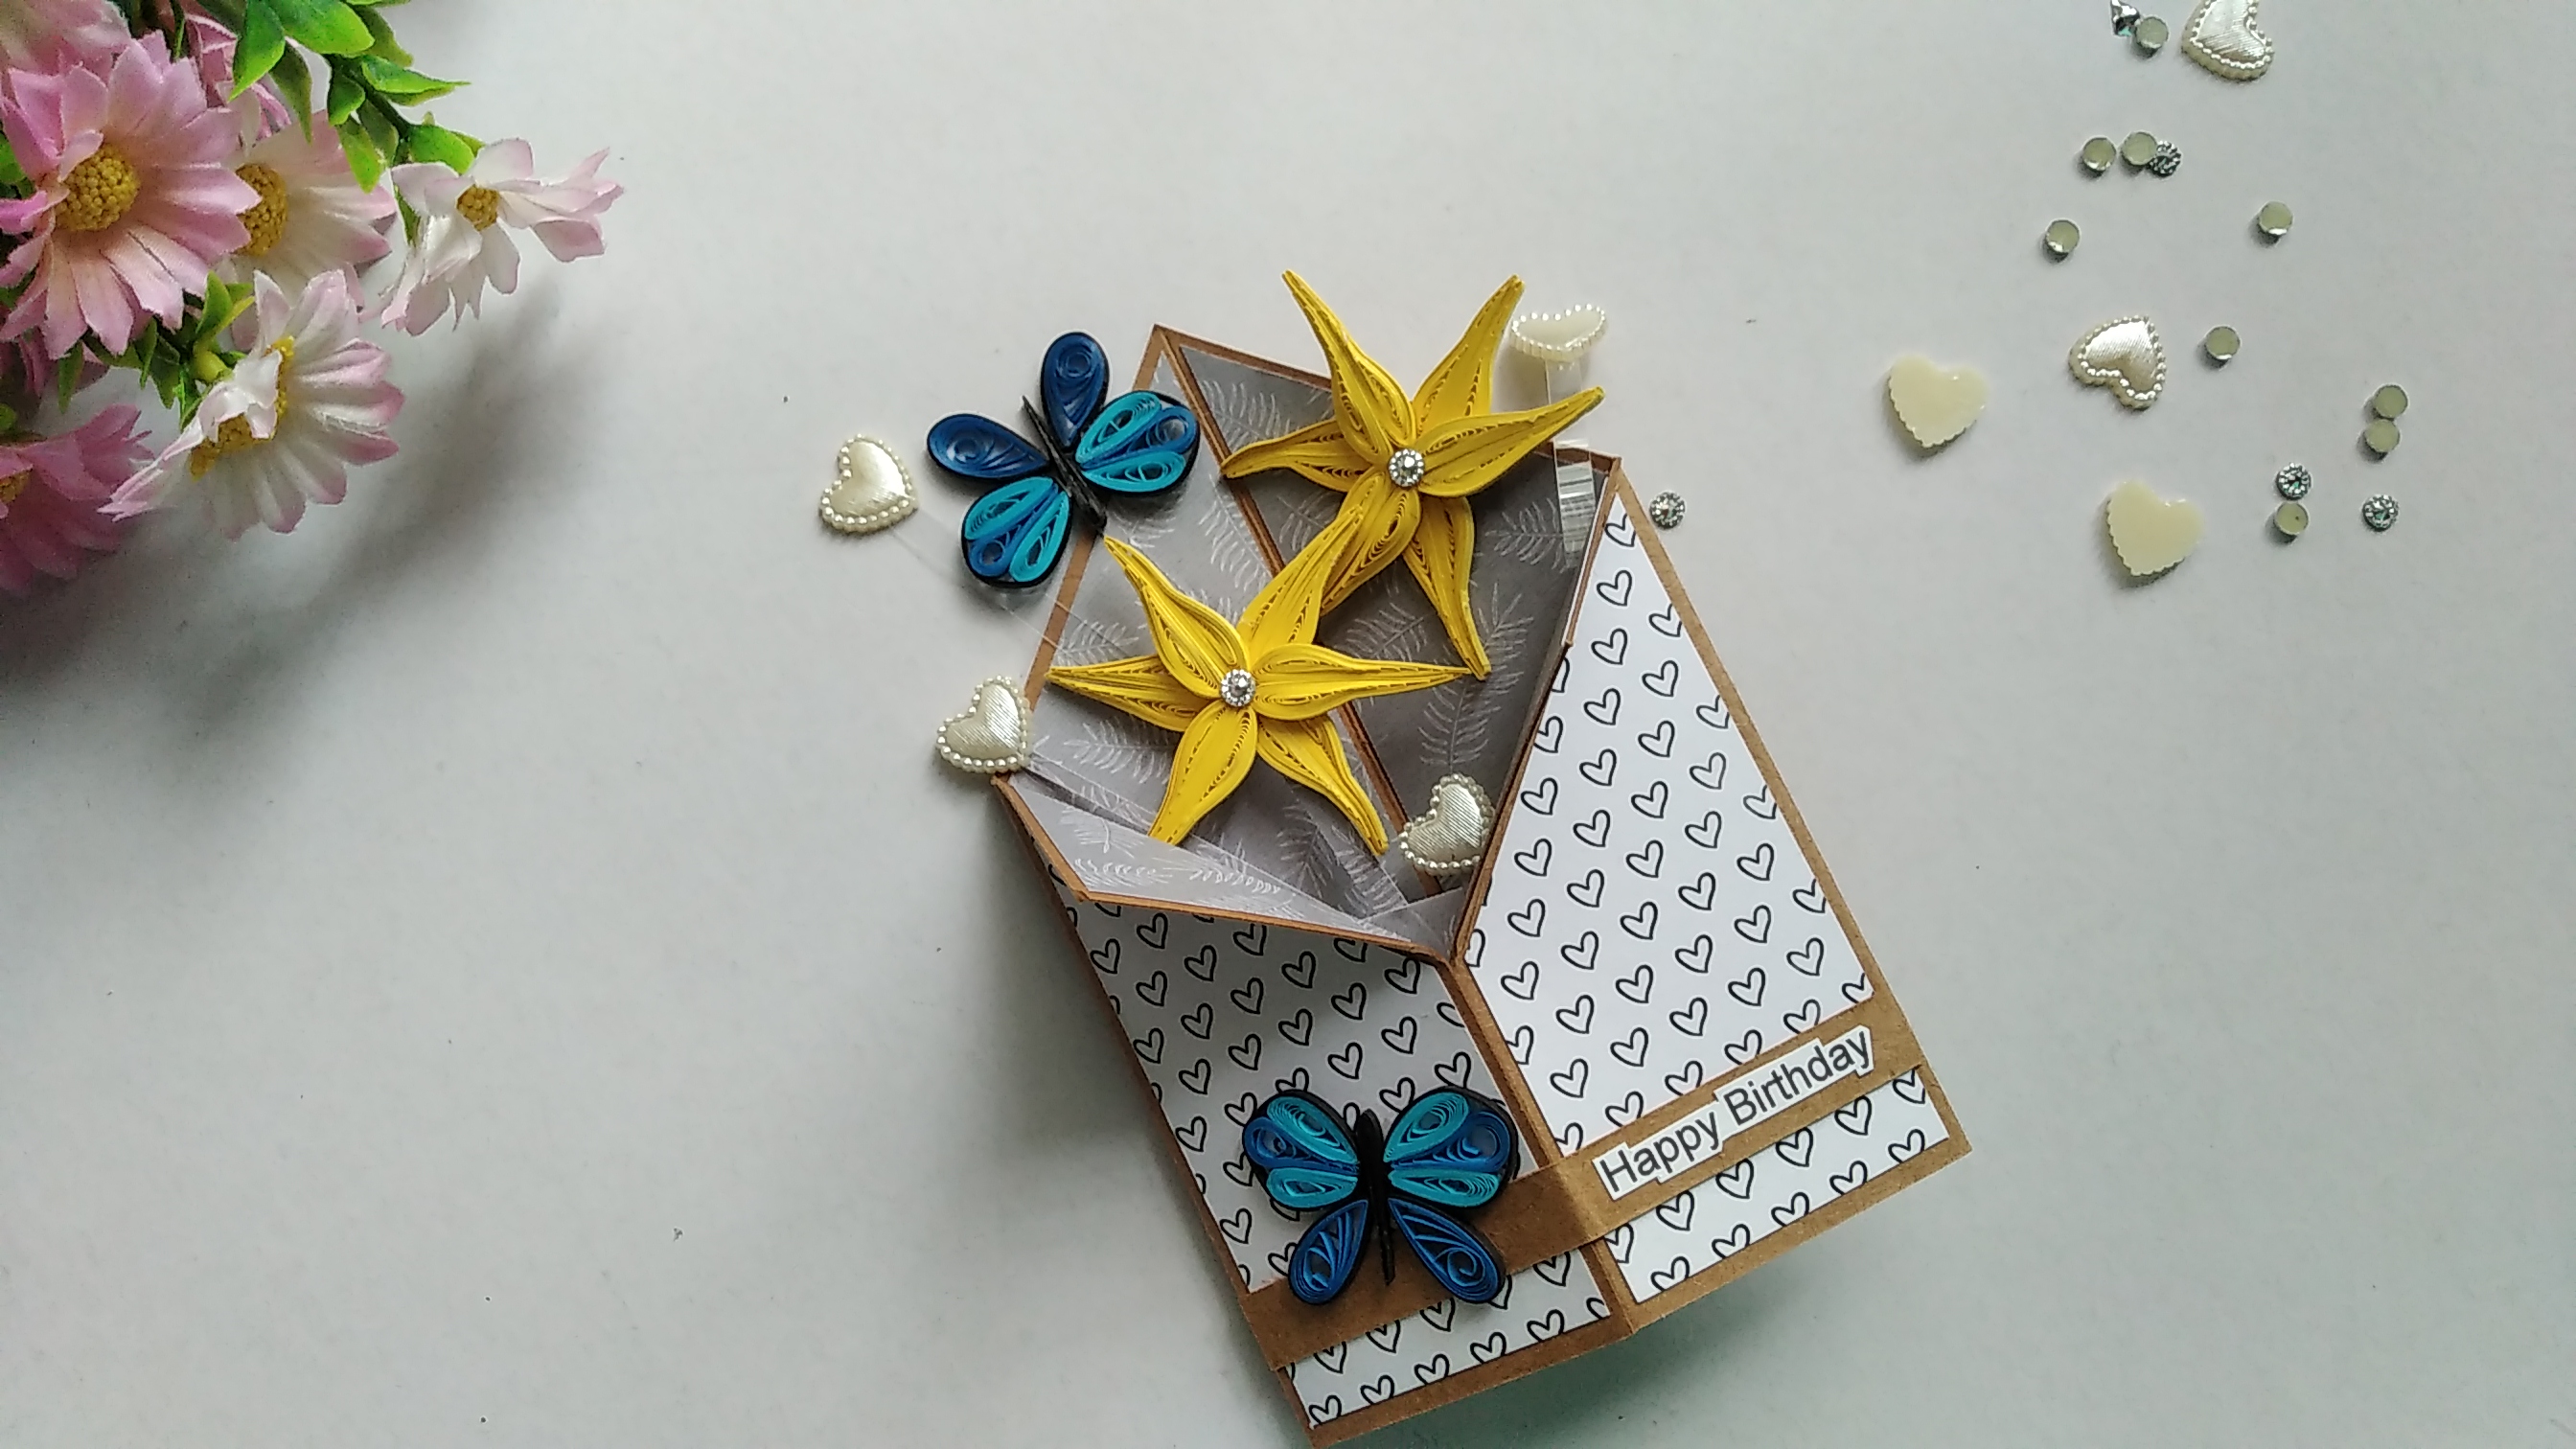
Finally, join the flap in the card base in the front of the card, to form a tuxedo look.
Now that the card base is done, let’s move on to the quilling part. The flowers are made with 2mm Lemon Tart colour paper strips. Follow the steps as shown in the picture.
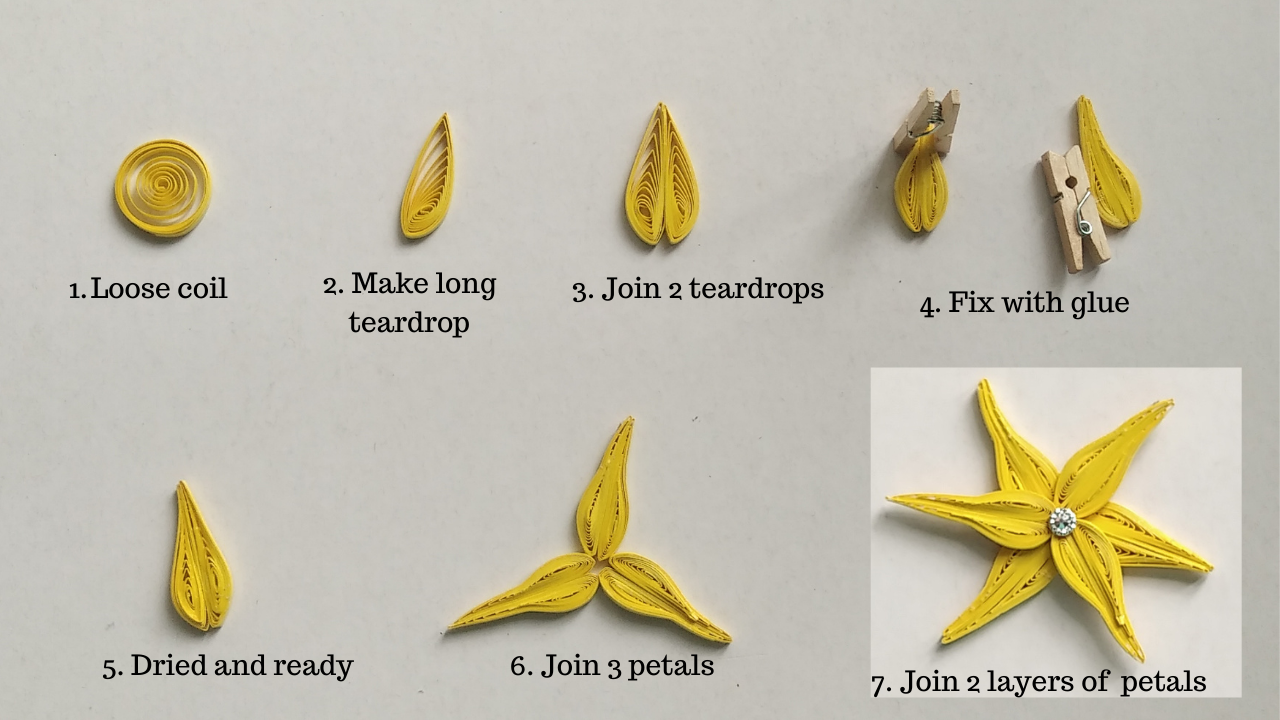
Using one full paper strip, make a loose coil and squeeze it at one end to make a long teardrop shape. Glue 2 teardrop shapes together, and apply glue to the surface of the shape. Press them tight to form a tighter shape. This forms one petal.
Join 3 petals to make the first layer of the flower. Use another 3 petals to make a top layer. Attach a flatback bindi embellishment to the centre.
For the butterflies, I used 2mm Dual Blue #2 quilling strips.
Join 3 petals to make the first layer of the flower. Use another 3 petals to make a top layer. Attach a flatback bindi embellishment to the centre.
For the butterflies, I used 2mm Dual Blue #2 quilling strips.
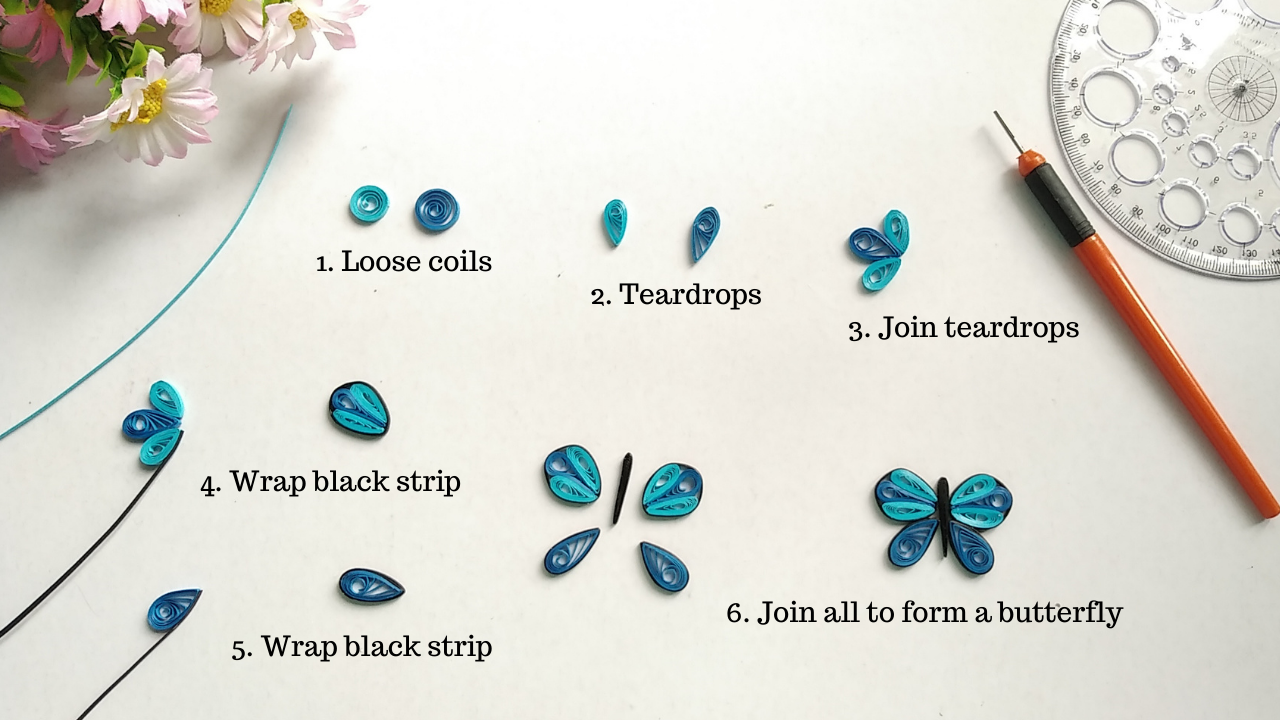
Using half a strip of paper, make a loose coil, and squeeze at one end to make a teardrop shape. For the loose coils, I use a circle scale to make sure the coils from both the 2 shades of blue were of different sizes. The lighter blue teardrops are smaller than the ones made from dark blue shade.
As shown in the picture, for upper wings, join 2 light blue teardrops and 1 dark blue teardrop, and wrap them around with black quilling paper strip. For the lower wings, wrap black paper strip to one dark blue teardrop.
For the body of the butterfly, using half strip of black paper, make a loose coil. Squeeze it at one end to make a long teardrop, and apply glue to the surface of the shape. Squeeze and hold the shape, so it fixes tight.
When all these elements are ready, join them all to form a butterfly.
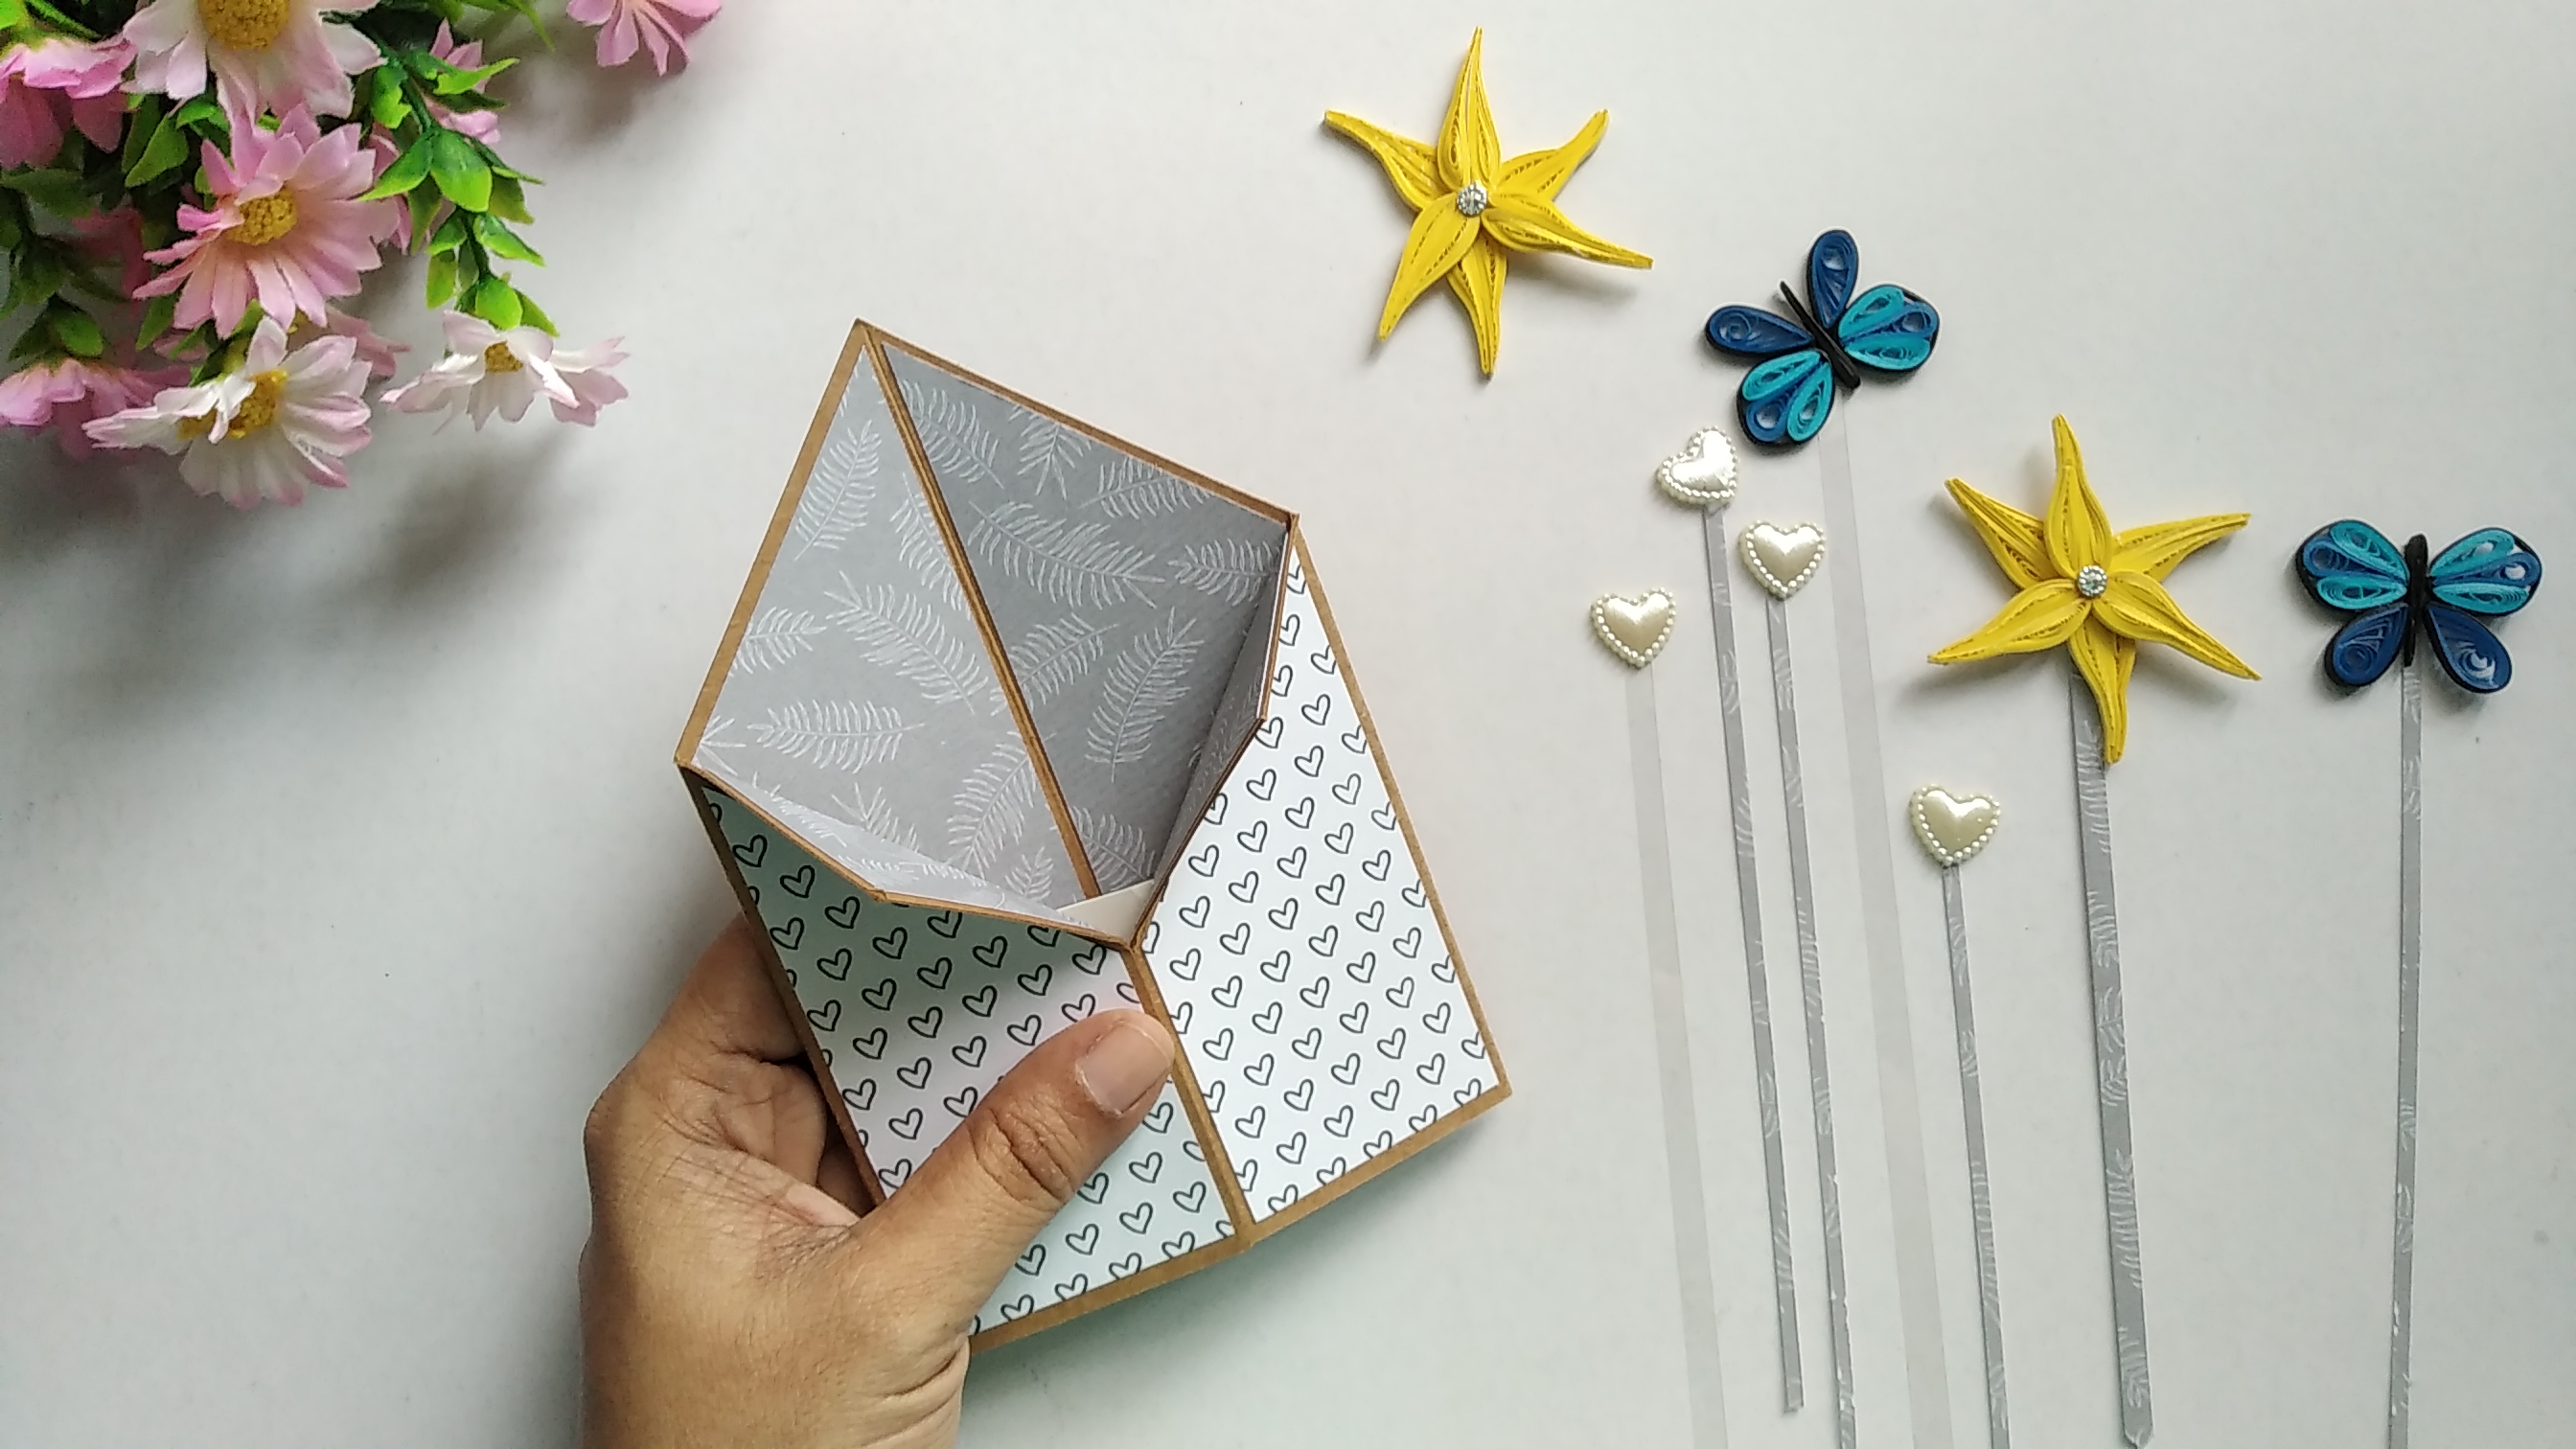
Next back to the card base. Take some strips of cardstock that measure 11 x 2 cms. Fold them at 2 cms from the ends. These strips (let us call them as ‘BARS’) are going to be the base to hold our popping quilled elements in place to the card base. [Ref Picture 4 & 5]. Fix the BARS to the inside of the card base.
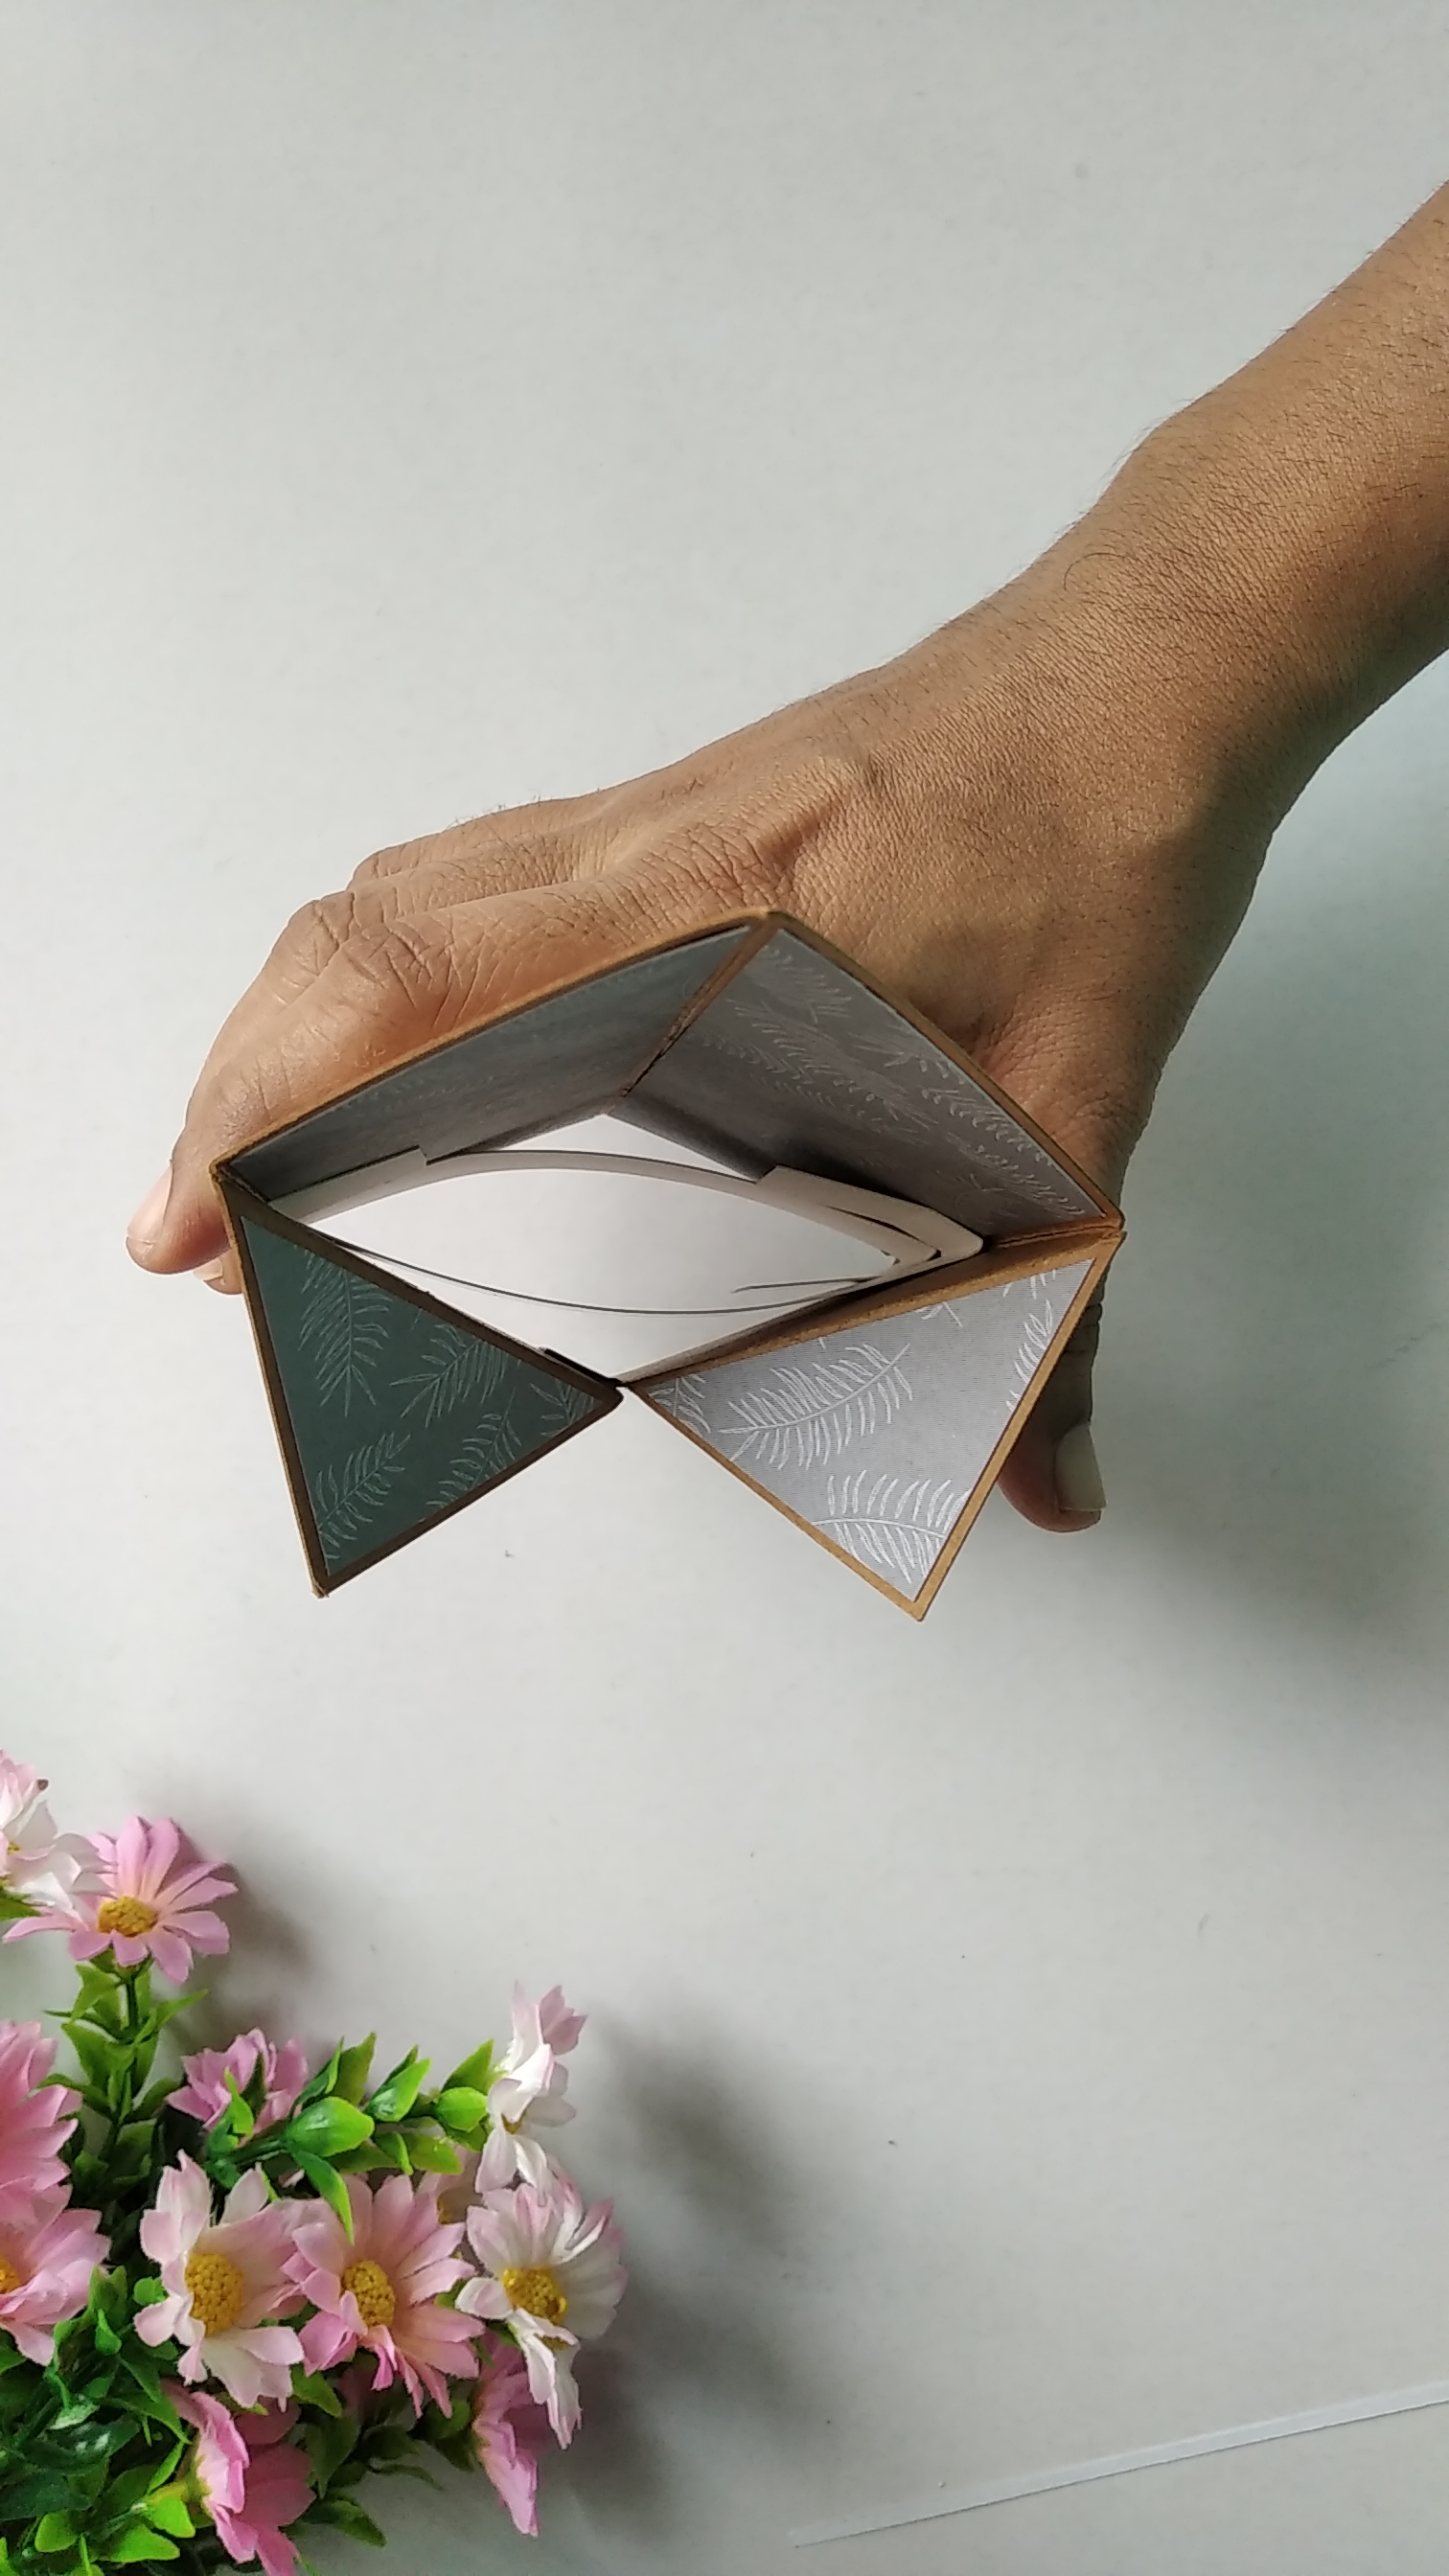
We also need some thin strips of cardstock and /or plastic transparent sheets, which will hold the flowers and butterflies. [Ref Picture 4]
Add the quilled elements and the heart embellishments to the thin strips of cardstock or plastic sheets. (Note: If you use transparent sheets do use an all-fix glue like E6000).
To finish, let's add a thin kraft cardstock strip, and some printed sentiments. Tada, we are done.
Here is a detailed video tutorial too
Materials Used:
Kraft cardstock, 400 gsm
Pattern papers: Black Monohues Series (8 x 8 inches)
Pattern papers: Happy Times (6 x 6 inches)
2mm quilling strips: Dual Blue #2, Lemon Tart, Black
CraftGully Quilling Slotted tool
Flatback Pearls 14mm Heart #2
Flatback Acrylic 5mm - Round Bindi - White Silver
Wooden Clips 30mm - Natural
Craft Tweezers - Curved
Perfect Craft Glue
Free Printables - Tuxedo Fold Card Template

Leave a Comment