
Quilled Bouquet In A Jar
20 May

Hello Crafters! Today’s project is going to be a fun and eco-friendly way to display your handmade quilled bouquets.
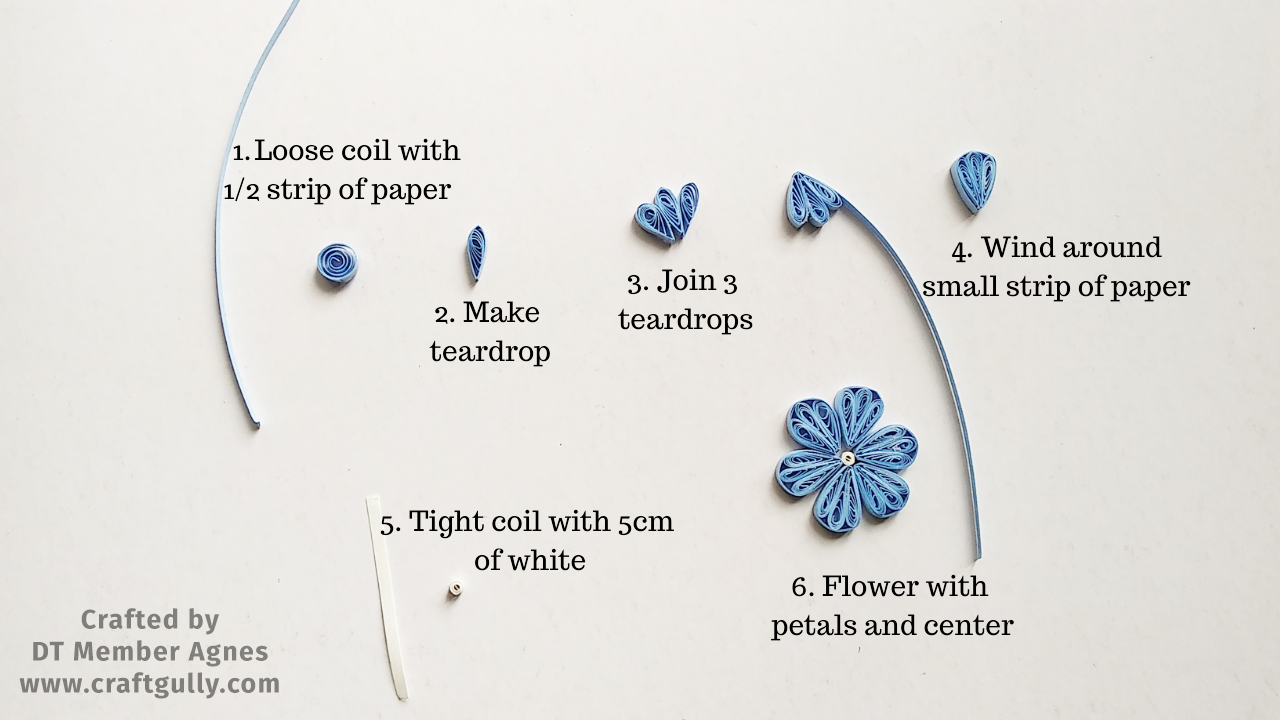
For the flowers, I used 3mm Ice Blue colour quilling strips. Each strip of paper is cut into 4 pieces. Make loose coil of 10mm wide circle in the quilling board (this is optional; you can just unwind between your fingers too). The loose coil is then squeezed at one end to form a teardrop shape. Join 3 such teardrops together and using a small strip of the same ice blue paper strip, wind around them to make a single petal.
For the centre of the flower, I use 3mm white quilling paper strips. The paper length measures approximately 5cms. Make a tight coil and stick 6 blue petals around this centre, to make a flower. You may need 5-6 flowers depending on your display method.
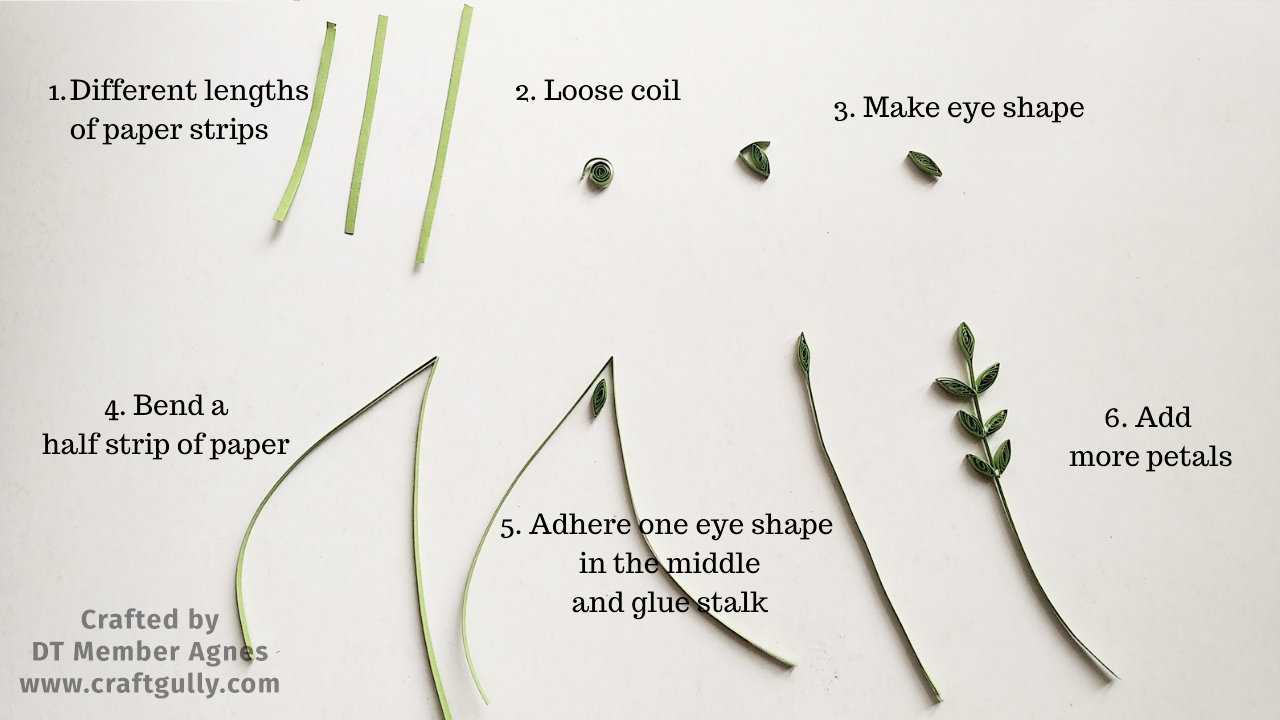
For the leaves, I use 3mm pear green colour quilling strips. Take smaller pieces of different lengths of these strips and make loose coils. Pinch at both ends of each coil to make eye-shapes (our goal is to have different sizes of leaves). Take a half strip of same colour strip, fold it into half and adhere one eye shape in the centre; continue to adhere the two folded sides of the paper strip together to form a thick stalk. Add more leaves on this stalk.
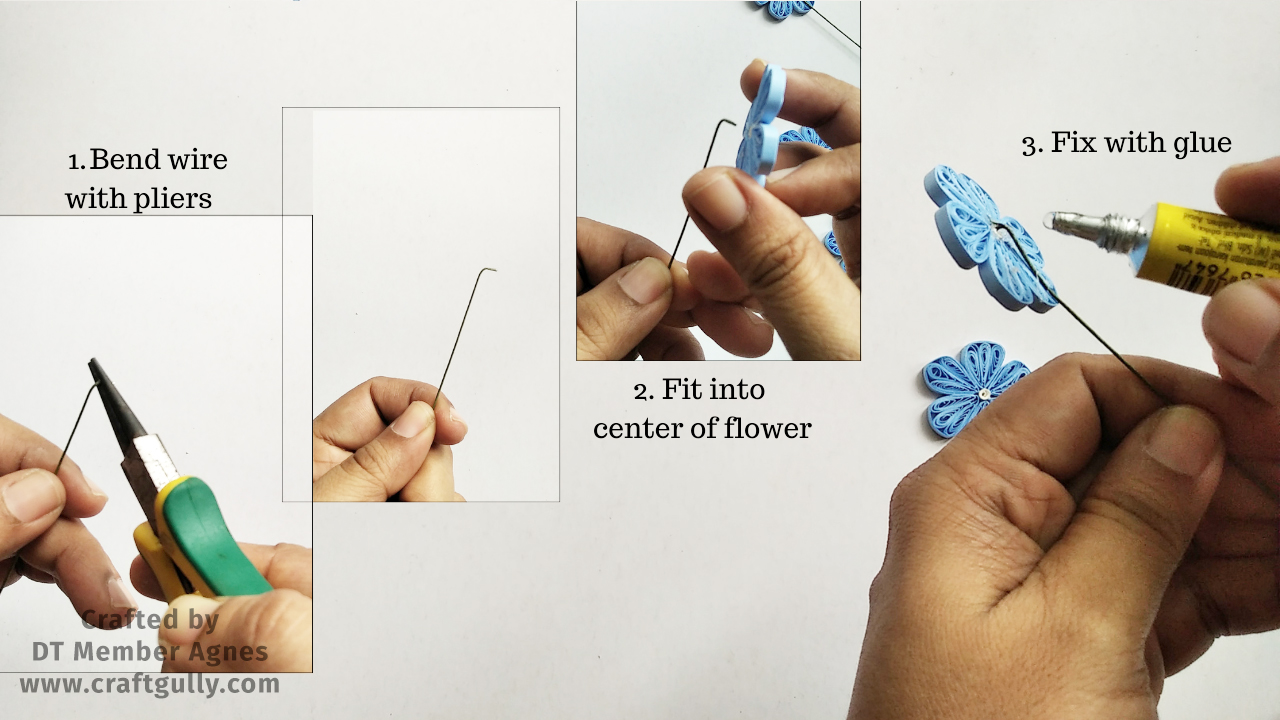
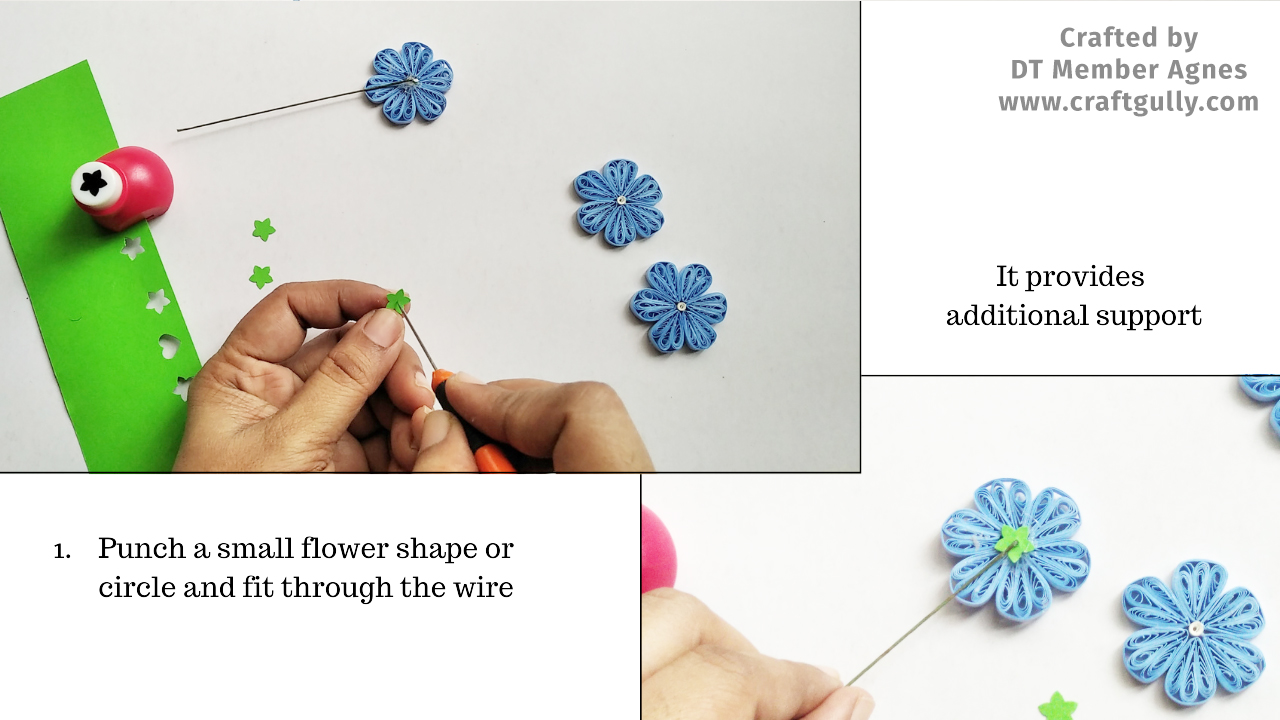
A flower-making wire can be added to the flower as stalk; this would give more stability to our flower. Use a stronger glue, and I also add a punched flower base through the wire for extra support (you can instead use a small circle cut out for support).
To each flower stalk, add a leaf. I made 4 pairs of flowers and leaves. Join them all together into a bunch. To the base of the flower bunch, I used 6 strips of pear green paper strips together and made a tight coil (it actually looked like an oval shape) around them. Make sure, that they hold the flowers well. It would be better to use wider strips for this base, to be more secure.

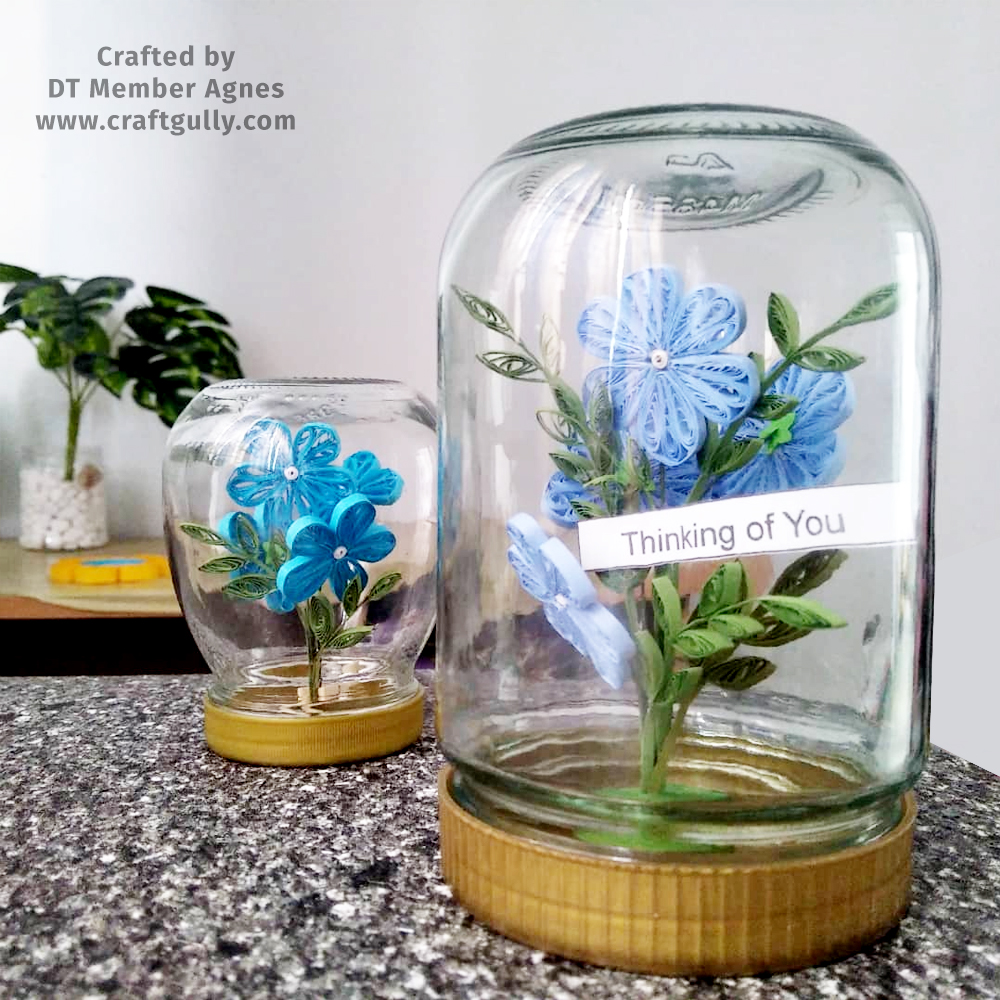
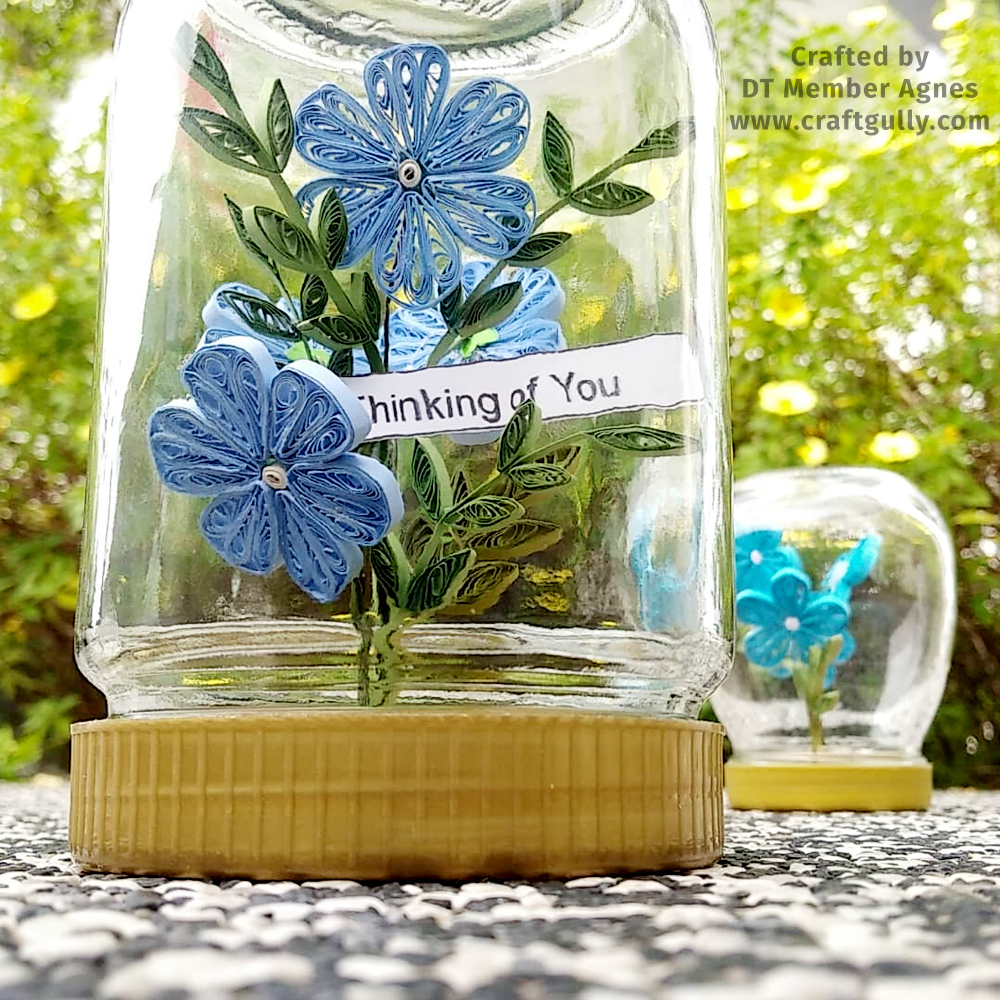
Finally, time to display; I am using an old glass bottle (a peanut butter jar). I add the bunch of flowers with its base to the cap of the glass bottle. Use stronger glue like E6000 which can hold on plastic. When it is dry, close the bottle.
Our glass display of flower bouquet is done. To create more interest, you can add wordings, beads, etc. You can also decorate the bottle’s cap with ribbons or colourful tapes.
Hope you enjoyed this project. Catch up next time with another interesting project.
Materials used:
3mm Quilling Strips: White, Ice Blue and Pear Green
CraftGully Quilling Slotted Tool
Quilling sizing board (optional)
Curved Tweezers
The Perfect Craft Glue
Flower making kit - wire, pliers and wire cutter
An old glass jar
3mm Quilling Strips: White, Ice Blue and Pear Green
CraftGully Quilling Slotted Tool
Quilling sizing board (optional)
Curved Tweezers
The Perfect Craft Glue
Flower making kit - wire, pliers and wire cutter
An old glass jar

Leave a Comment