
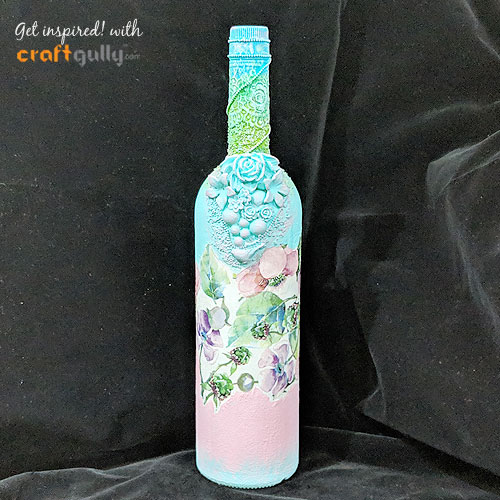
Decoupaged Bottle Art

Hi friends, today I will share my new decoupage project on a bottle.
This has been made for the DT post for CraftGully.
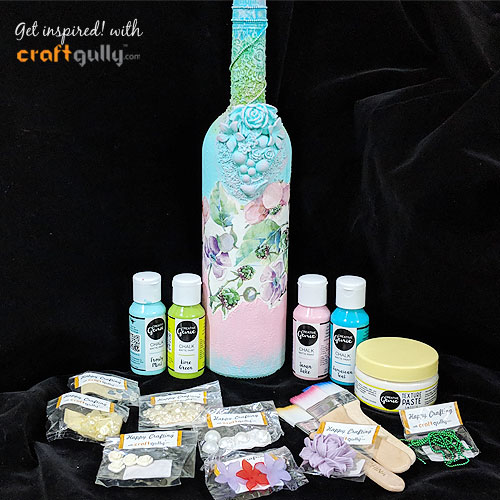
Numerous products from the CraftGully store have been used like Creative Genie chalk paints, Decoupage napkins, Texture paste, flat back pearls, decoupage paint brushes and number of small decorative embellishments.
Here is a step by step guide to make them.
Step 1: Cover the whole bottle with any white heavy gesso and let dry.
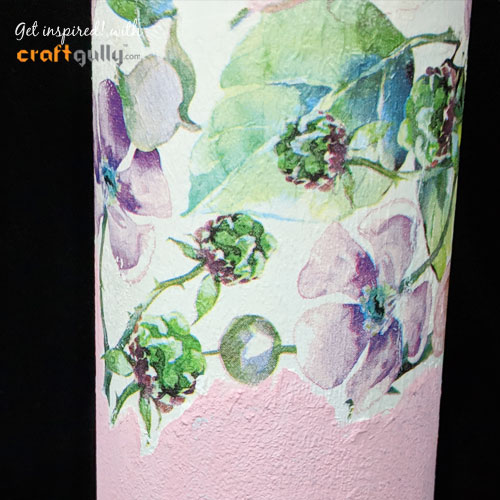
Step 2: Separate the top printed layer of the desired decoupage napkin and with the help of a thin paint brush dipped in water tear out the segments you want to paste on the bottle. Place them on the bottle and adjust as necessary.
Step 3: With the help of the decoupage paint brush apply decoupage glue in thin even layer on the places you want to place the napkin segments. Gently place the napkin segments on that part. Start applying decoupage glue on the napkin segments from the centre to the outside. After the napkins have been pasted let it dry completely.
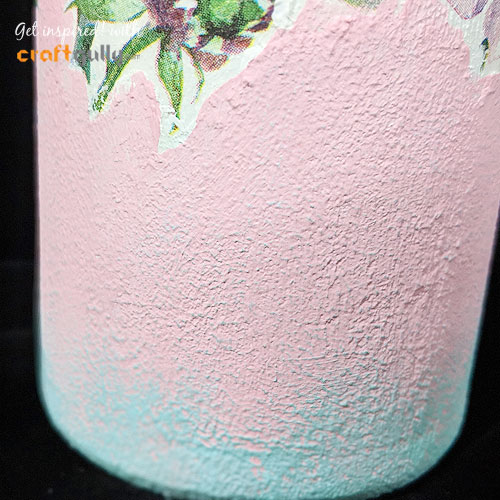
Step 4: Take a small piece of the craft sponge dipped in Creative Genie Smooth Texture Paste and start applying on the bottle leaving the decoupaged parts and the neck of the bottle. Make sure that the uneven texture is enhanced by the sponge. Let it dry completely.
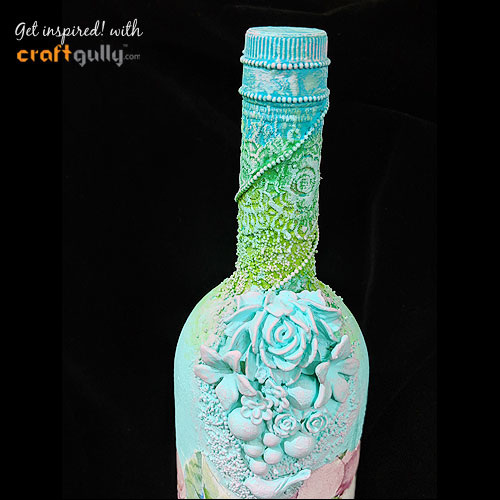
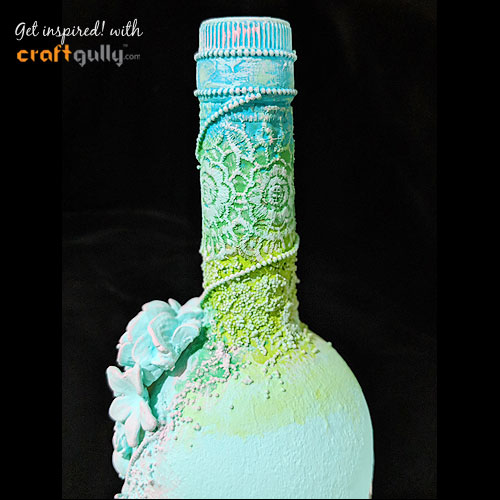
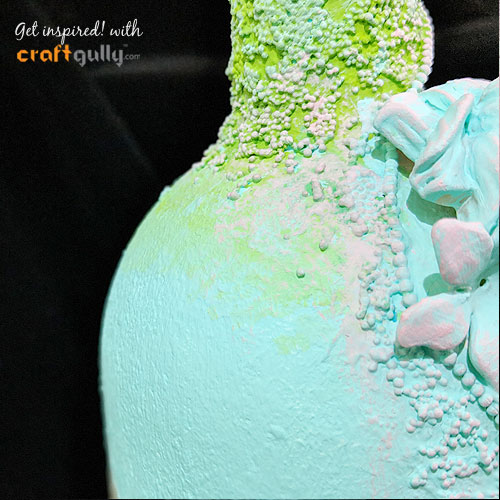
Step 5: Add the embellishments as shown or as desired by you with heavy matt gel medium. For the grainy effect add tiny granules to the texture paste and apply on the lower part of the bottle neck. Add the ball chain to the lid and in a slanting manner encircling the neck of the bottle. You can also add it the embellishments like I have done. Let all these dry completely making sure all embellishments are adhered properly.
Step 6: Taking the Swan lake shade of the creative Genie chalk paint with a flat brush start applying on the lower part of the bottle along with the base. Fill in finer details near the decoupage napkin with thin brush. Let it dry completely.
Take Frosty Mint Creative Genie Chalk Paint and with upward strokes, colour just the base of the bottle merging it with the Swan Pink shade. Let it dry completely.
Step 7: Similarly paint the neck starting the top of the bottle with Jamaican Teal Creative Genie chalk paint, followed by the Lime Green on the bottle neck. Completely cover rest of the bottle with the Frosty Mint shade including the embellishments. Try to merge the colours while starting the next adjoining colour. With Dry brushing technique use Swan Lake shade to dry brush the embellishments and all over the neck of the bottle neck. You can also use Frosty Mint shade to dry brush the top of the lid
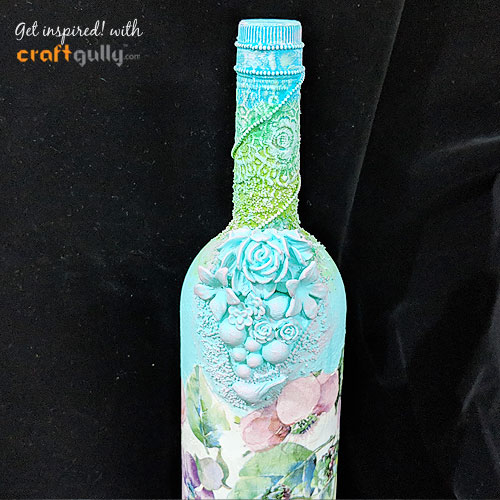
Step 8: Add a coat of varnish over the entire bottle and your decoupage bottle is ready.
So what are you waiting for , gather your CraftGully supplies and get your creative juices flowing!
Main Products Used:

Leave a Comment