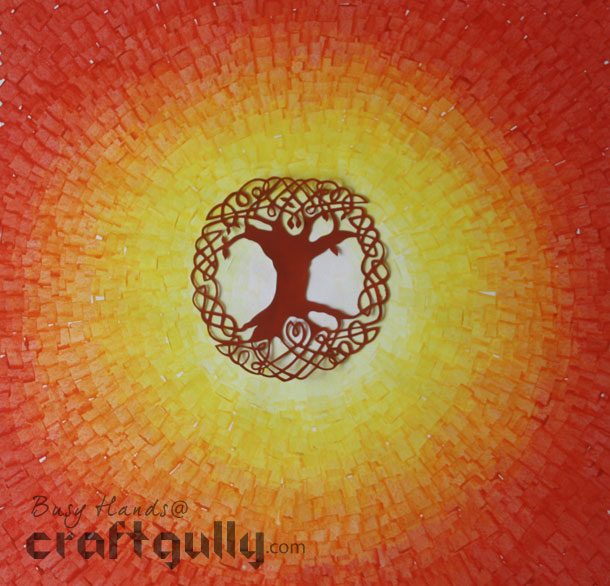
Tree of Life - Texture Painting Project
26 Aug

Tree of Life - Texture painting using blade
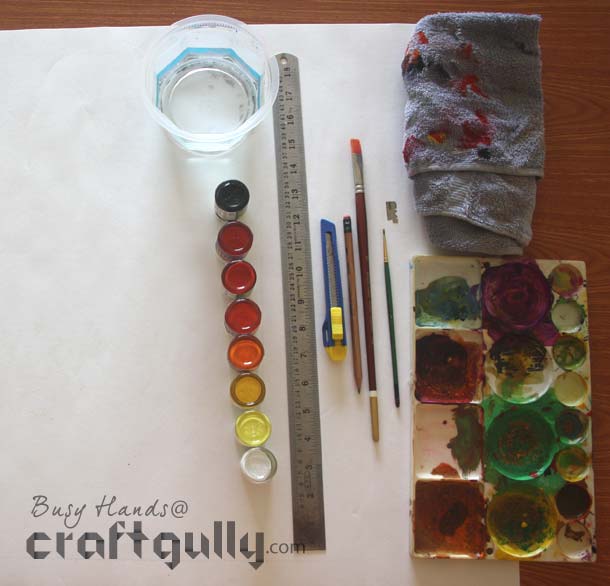
Things you will need:
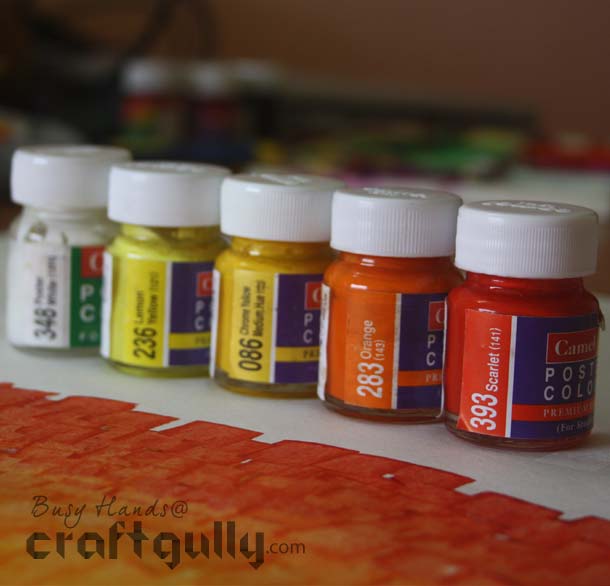
Brush with thin handle, ¼ of a shaving blade, Big brush, Pencil, Scale, Cutter, Palette with a flat partition (you can also use a plastic plate), Poster paints (consider the colour spectrum that you want and take colours accordingly. We have used colours to create a gradient from white to dark crimson), Paper – a little larger than the size that you want the painting to be, Water and Rag
Step 1:
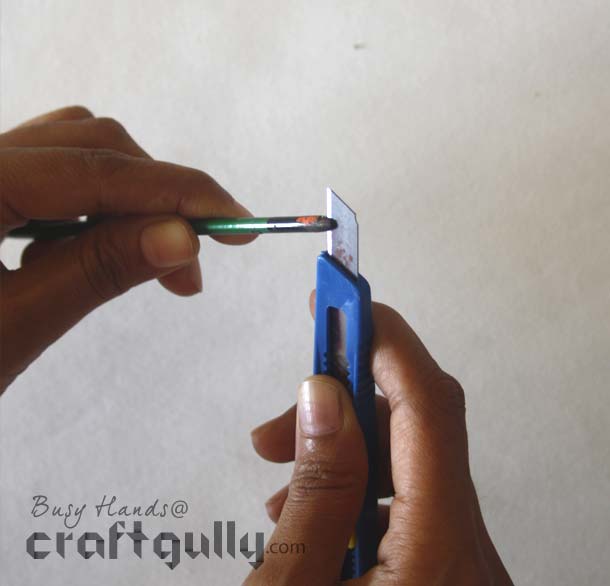
Mark the square on the sheet of paper. Be sure to leave a little margin around exact size marking. Using the cutter, make a little slit in the back of the thin handled brush. Insert the ¼ blade into this slit with the sharp edge on the outside.
You are ready to start painting.
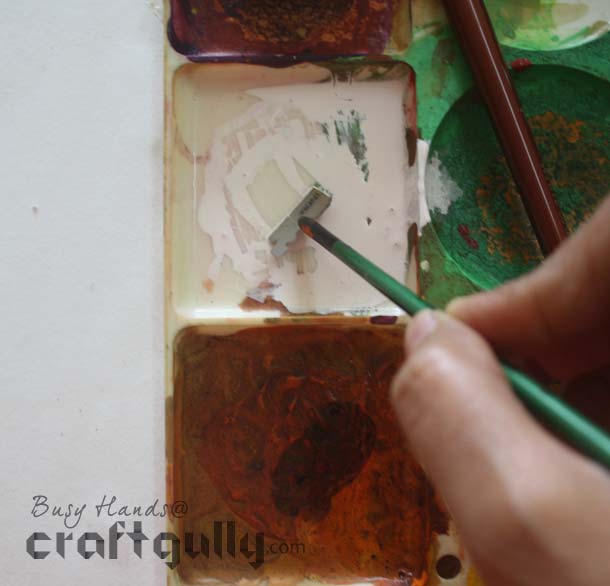
Step 2: To start, take white onto your palette. It should not be too watery nor should it be too thick. A nice thick flowing consistency should be maintained at all times. Using your blade tool, scrape some colour off the palette.
Step 3: Start applying the colour in short straight strokes in the centre of the square. Keep rotating the paper so that you are filling in the strokes in a circular pattern.
Step 4: Gradually introduce a little bit of the Lemon Yellow to the white and continue applying the strokes. Always drag some of the colour from the earlier stroke along with new stroke. This helps mix the colours and create a nice gradient. But do not make the strokes too monotonous.
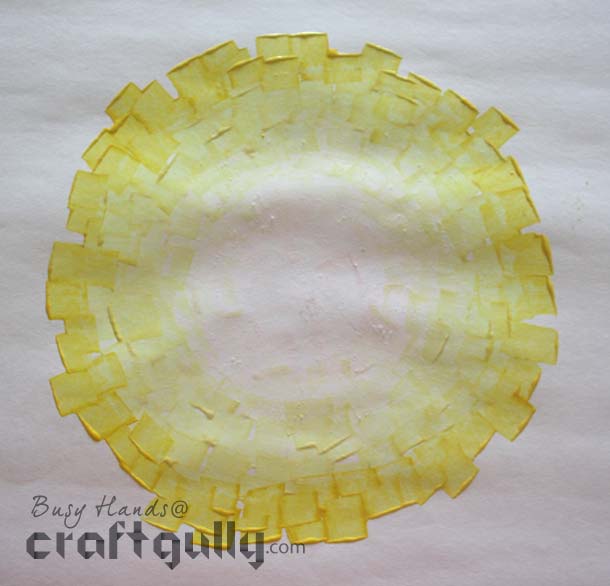
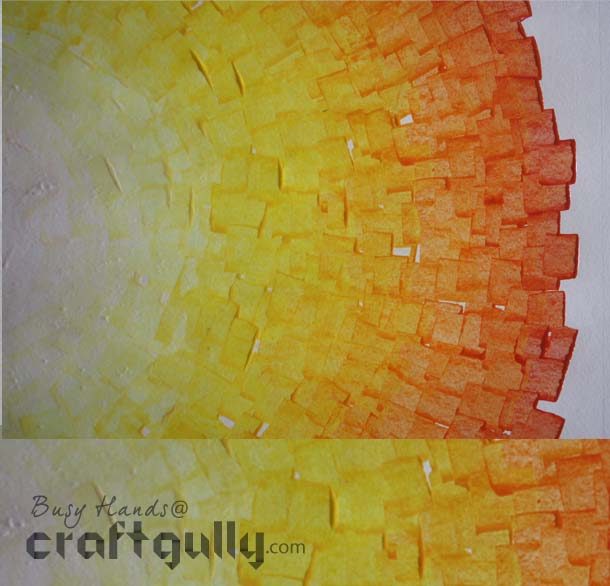
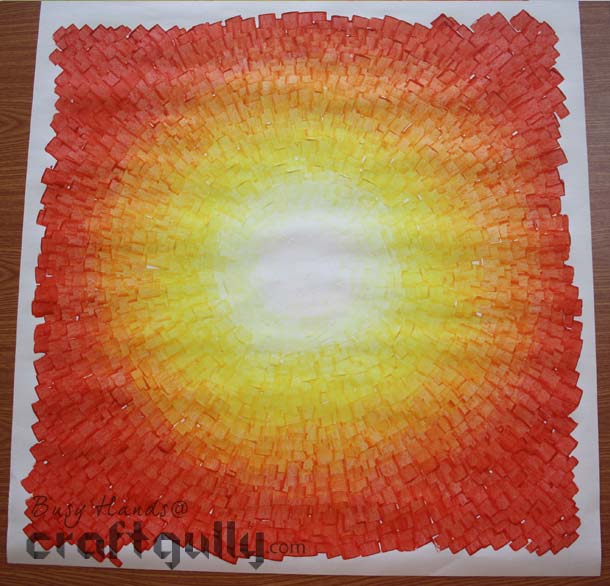
Step 5: Continue to introduce the colours gradually till you have reached the outermost edge of the square. Your gradient and texture would look something like this.
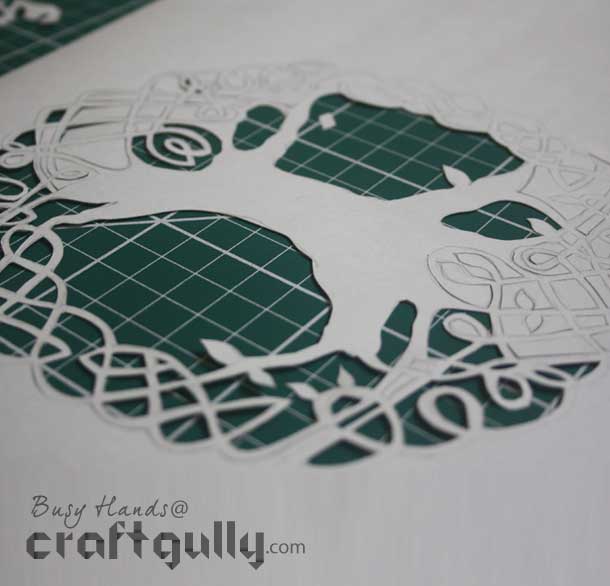
Step 6: Draw/Trace your desired pattern onto a paper and cut out the details.
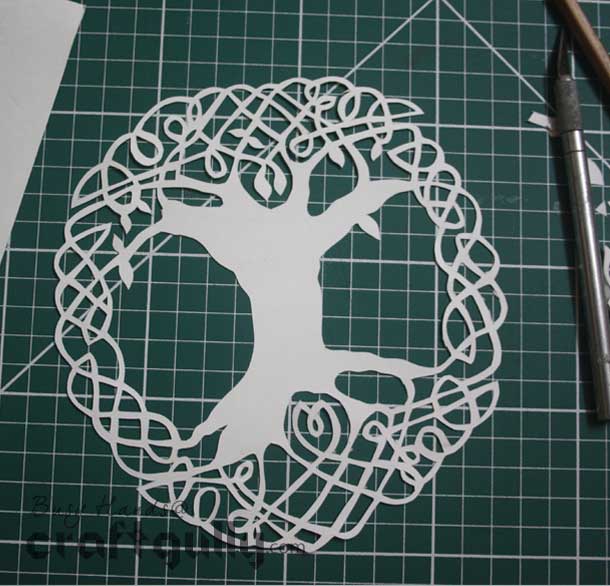
Step 7: Colour the motif a darker shade than the outermost colour in your painting. Colouring gives it the same look and feel as the rest of the painting. You can always use a coloured paper to if you wish.
Step 8: Paste the motif onto the centre of the gradient. Your painting is ready.
Tips from Team CraftGully:
-Use paper that has a slight grain showing in the texture. The paper used in the demonstration is a white cartridge paper normally used by art students.
-The sharp end of the blade will have slight curve on one side. That should be the side touching your paper.
-Keep cleaning your blade on the rag to remove excess colour that might get accumalted towards the brush handle but never clean it just when adding new colours to the pallete.
-Use the same partition to keep adding new colours as this will help you get a sense of the gradation of the colours. Too much of a new colour and you will have a patch that you cant undo. Initially keep a rough sheet on the side to try out the colour before applying it on the main paper.
-Colours used in this demonstration
Let us know how your Texture Painting turns out :)
Happy Crafting™

Leave a Comment