
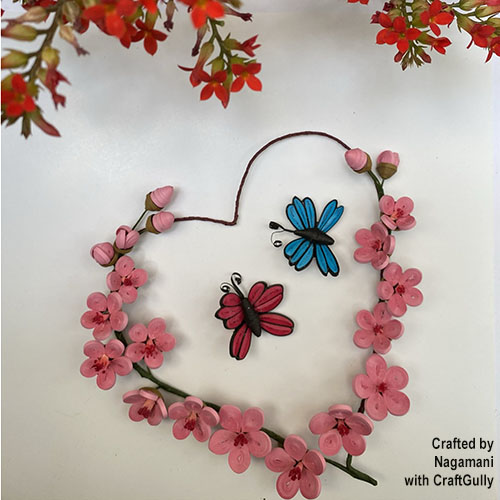
Cherry Blossom Wreath
30 Oct

Let's make a cherry blossom wreath today?!
Cherry blossoms signify new beginnings. Pink is the colour of universal love of oneself and of others. February signifies the flush of first love.
So, I couldn't think of anything else, but pink cherry blossom branches as a theme for my next DT project.
So, I couldn't think of anything else, but pink cherry blossom branches as a theme for my next DT project.
Quilling cherry blossoms are always a delight. Let's get into the process.
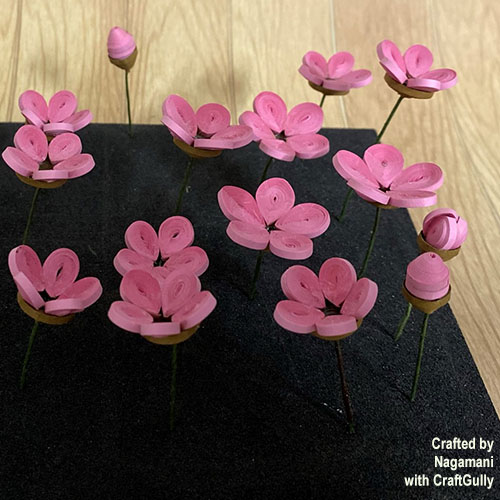
Flowers
Using pink 2mm quilling strips, make tight coils. To make the arrangement look natural, we would need flowers of different sizes and two varieties of buds (using 2,3 coils). Attach the floral wire to the flower, so that they can be assembled into a branch
Using pink 2mm quilling strips, make tight coils. To make the arrangement look natural, we would need flowers of different sizes and two varieties of buds (using 2,3 coils). Attach the floral wire to the flower, so that they can be assembled into a branch
Pistils
The centre part of the cherry blossom is delicate & slightly darker. I've used duplex paper and cut it into a narrow strip. Using a pink brush pen, slightly color on one edge of the strip.
Then, fringe it nicely and using a quilling tool, wrap it & apply glue. Attach to the centre part of the flower. Your flowers are now ready!
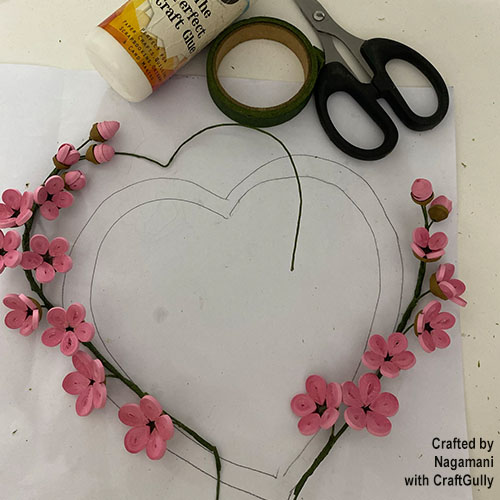
Wreath Arrangement
Bend two floral wires in the shape of a heart. The buds and flowers are arranged onto the top of this wire one after the other.
I used a maroon 2mm quilling strip to cover the upper portion of the floral wire where the flowers are absent.
Bend two floral wires in the shape of a heart. The buds and flowers are arranged onto the top of this wire one after the other.
I used a maroon 2mm quilling strip to cover the upper portion of the floral wire where the flowers are absent.
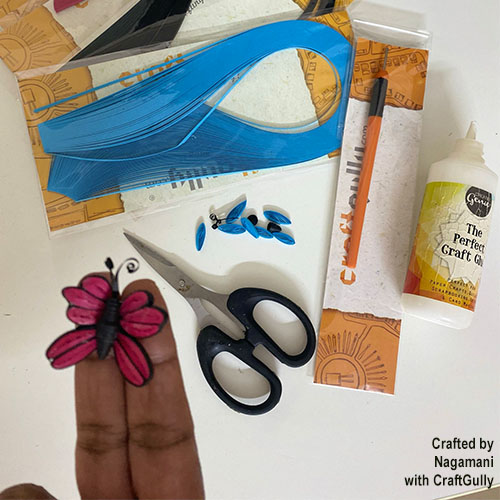
Butterflies
To bring in some life to the arrangement, I've added two simple butterflies - one in pink and one in blue. Make tight coils in different shapes (oval, teardrop) and wrap them around with a black strip.
Arrange all of these as butterfly wings. The body of the butterfly is made with two black tight coils, which are gently made into a cone shape.
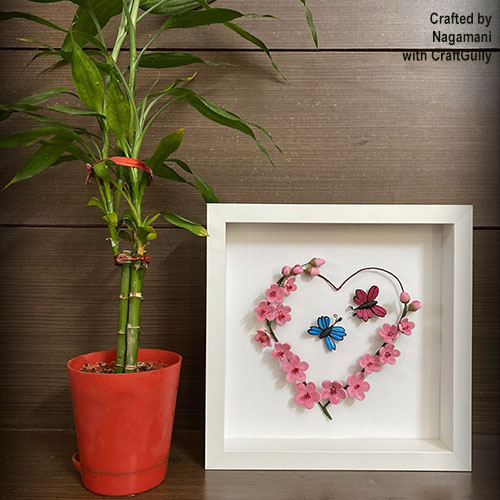
And that's all - Heart-shaped cherry blossom wreath is ready! Hope this is ringing in the valentine vibe.
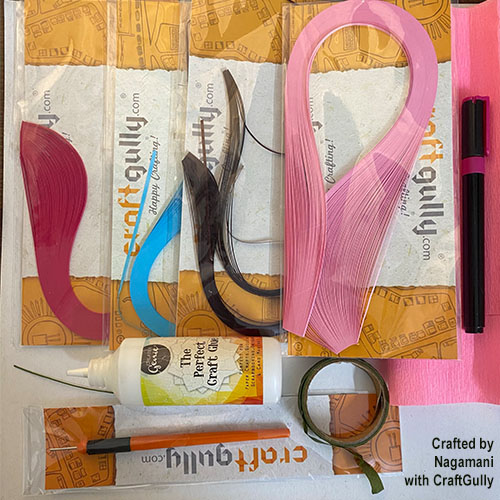
Materials Used:
Quilling Strips 2mm - Baby Pink, Dark Pink, Blue, Maroon, Black
CraftGully Quilling Slotted Tool
The Perfect Craft Glue
Pre-Taped Wire
Flower Making Tape
Duplex Paper - Pink
Brush Pen
Quilling Strips 2mm - Baby Pink, Dark Pink, Blue, Maroon, Black
CraftGully Quilling Slotted Tool
The Perfect Craft Glue
Pre-Taped Wire
Flower Making Tape
Duplex Paper - Pink
Brush Pen

Leave a Comment